Jigs

Jig making is an essential part of wood art. Your designs will only be as tight as your jigs will allow and your ability to use them. Jigs also greatly increase your accuracy in design and safety by keeping your fingers away from the blade.  It may surprise you how simple and easy to make my jigs are.

Ripping jig assortment

Ripping jig assortment

Here is a sample of ripping jigs. Some are for specialized cuts but the center one can accommodate almost any shape and size. Below is one of my favorite, a simple sheet of plywood or MDF with hold down clamps located where ever I need them to be.  Hold down clamps are an essential part of jig making and the multi generational method. I have them for sale on the ‘stuff for sale’ page for much less than most would be able to buy them.

a favorite

a favorite

The first order of events is to insure your ripping fence will not move by clamping it firmly in place. Then we cut an eight inch or so off the edge of our jig to within an inch or so of its bottom. Since our fence will not be moving we know precisely where the blade will pass in relation to the jig, ie: its edge.

By transferring the line to the board bottom we can align the cut precisely.

By transferring the line to the board bottom we can align the cut precisely.

By transferring our line off the top of our board on both its front and rear,  to its bottom it will be easy to align our line to the edge of the jig and therefore the location of the blade.

Alignment of the blade to a true 90 degrees and alignment of the bottom line to the jig edge is vital.

Alignment of the blade to a true 90 degrees and alignment of the bottom line to the jig edge is vital.

Our blade is checked and rechecked for its 90 degree accuracy. Also in the bottom left corner notice the line on the design board is aligned carefully with the jig edge. Also, I use cut up pieces of sponge sanding blocks to help the hold down clamps hold the piece firmly.

blade fallows the lines

blade fallows the lines

Care is taken with each cut, watching how the blade interacts with the top line. If it was aligned properly our cut should be directly above the jig edge and fallow our top line.

slow even consistant pushing

slow even consistent pushing

Care should be taken to have a slow consistent push of the material into the blade. I use extra hold down clamps as handles.

This had been the long way of saying something that is really quite simple and intuitive. This jig helps me get great results and keeps my fingers away from the blade. Try it , and I think you will agree.

Yours in wet glue.

Steve


Creating multi generational lamination’s of all types and varieties is a fun and easy process.

Multi generational lamination is not that difficult.

Multi generational lamination is not that difficult. Here we have 4 Generations of Walnut and Birch with its original material below.

Creating multi generational lamination’s of all types and varieties is a fun and easy process.
The process consists of :
A: Cutting boards into strips.
B: Laminating (gluing) those strips back into a board with a different pattern.
C: Repeat until desired design is achieved.
If for example we begin with two different boards with contrasting colors (cherry and oak) and cut them into strips we then can glue them back into board form with an alternating strip pattern.

We begin with boards of cherry and oak which are cut into strips and then glued back together into board form with an alternating pattern.

We begin with boards of cherry and oak which are cut into strips and then glued back together into board form with an alternating pattern.

This new board is then cut into strips of 60 degrees .

This new board is then harvested into strips once again at a 60 degree angle.

This new board is then harvested into strips once again at a 60 degree angle.

These new strips are then realigned into a new pattern and glued back into board form

By flipping every other one over we create a 'chevron' pattern to make a new board with a new pattern.

By flipping every other one over we create a ‘chevron’ pattern to make a new board with a new pattern.

This new board is used to create a lazy susan.

Our new chevron pattern board is used to create a lazy susan, a favorite around our kitchen.

Our new chevron pattern board is used to create a lazy susan, a favorite around our kitchen.

However if we choose we can cut our lazy susan material again with a 45 degree cut and use these strips to create the cutting board to its right

Our chevron pattern board could be harvested once again, cut into strips at 45 degrees to create the cutting board on the right.

Our chevron pattern board could be harvested once again, cut into strips at 45 degrees to create the cutting board on the right.

From board to strips to board again , as many times as our imagination will allow.

All 3 generations are shown , demonstrating from board to strips to board to strips and lastly, from board to strip.

All 3 generations are shown , demonstrating from board to strips to board to strips and lastly, from board to strip.

Really , not as hard as it seems. If you are willing to get it wrong the first time the second may surprise you.
Always in wet glue
Steve

Multi Generational Diamond Lamination (MGDL) or Fun with Diamonds

MGDL
or
Fun with Diamonds
Diamonds may be a girl’s best friend but the wood worker’s among us can have lots of fun with projects using diamonds to make dynamic wood art.
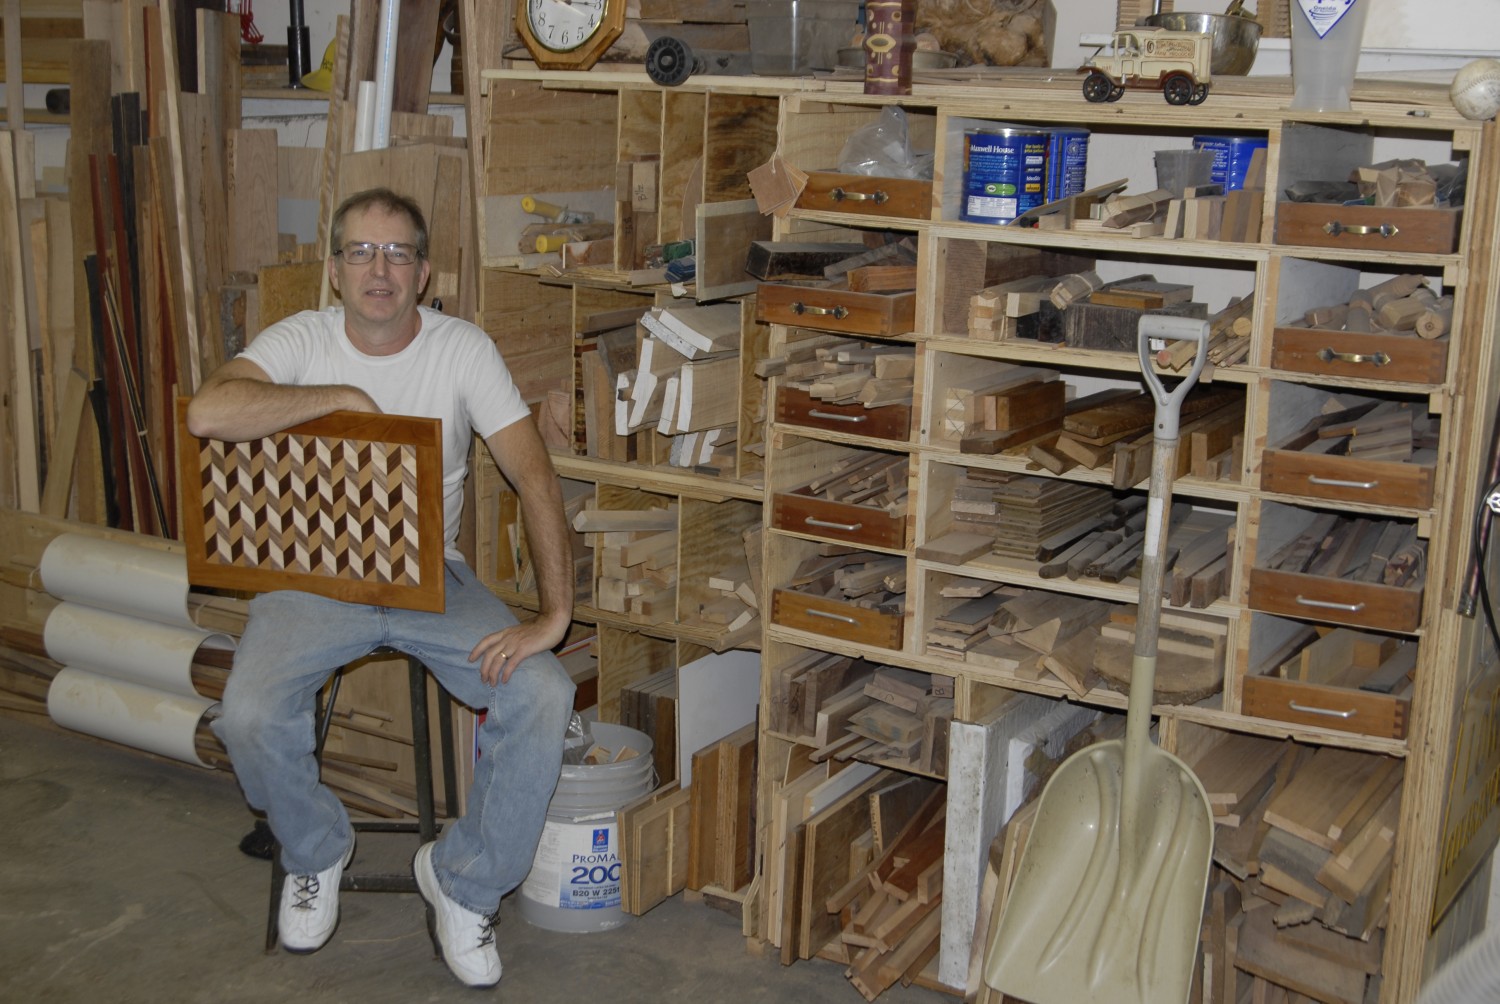
Multi Generational Diamond Lamination (MGDL) is the process of gluing multiple first generation laminations into both vertical and circular design patterns.
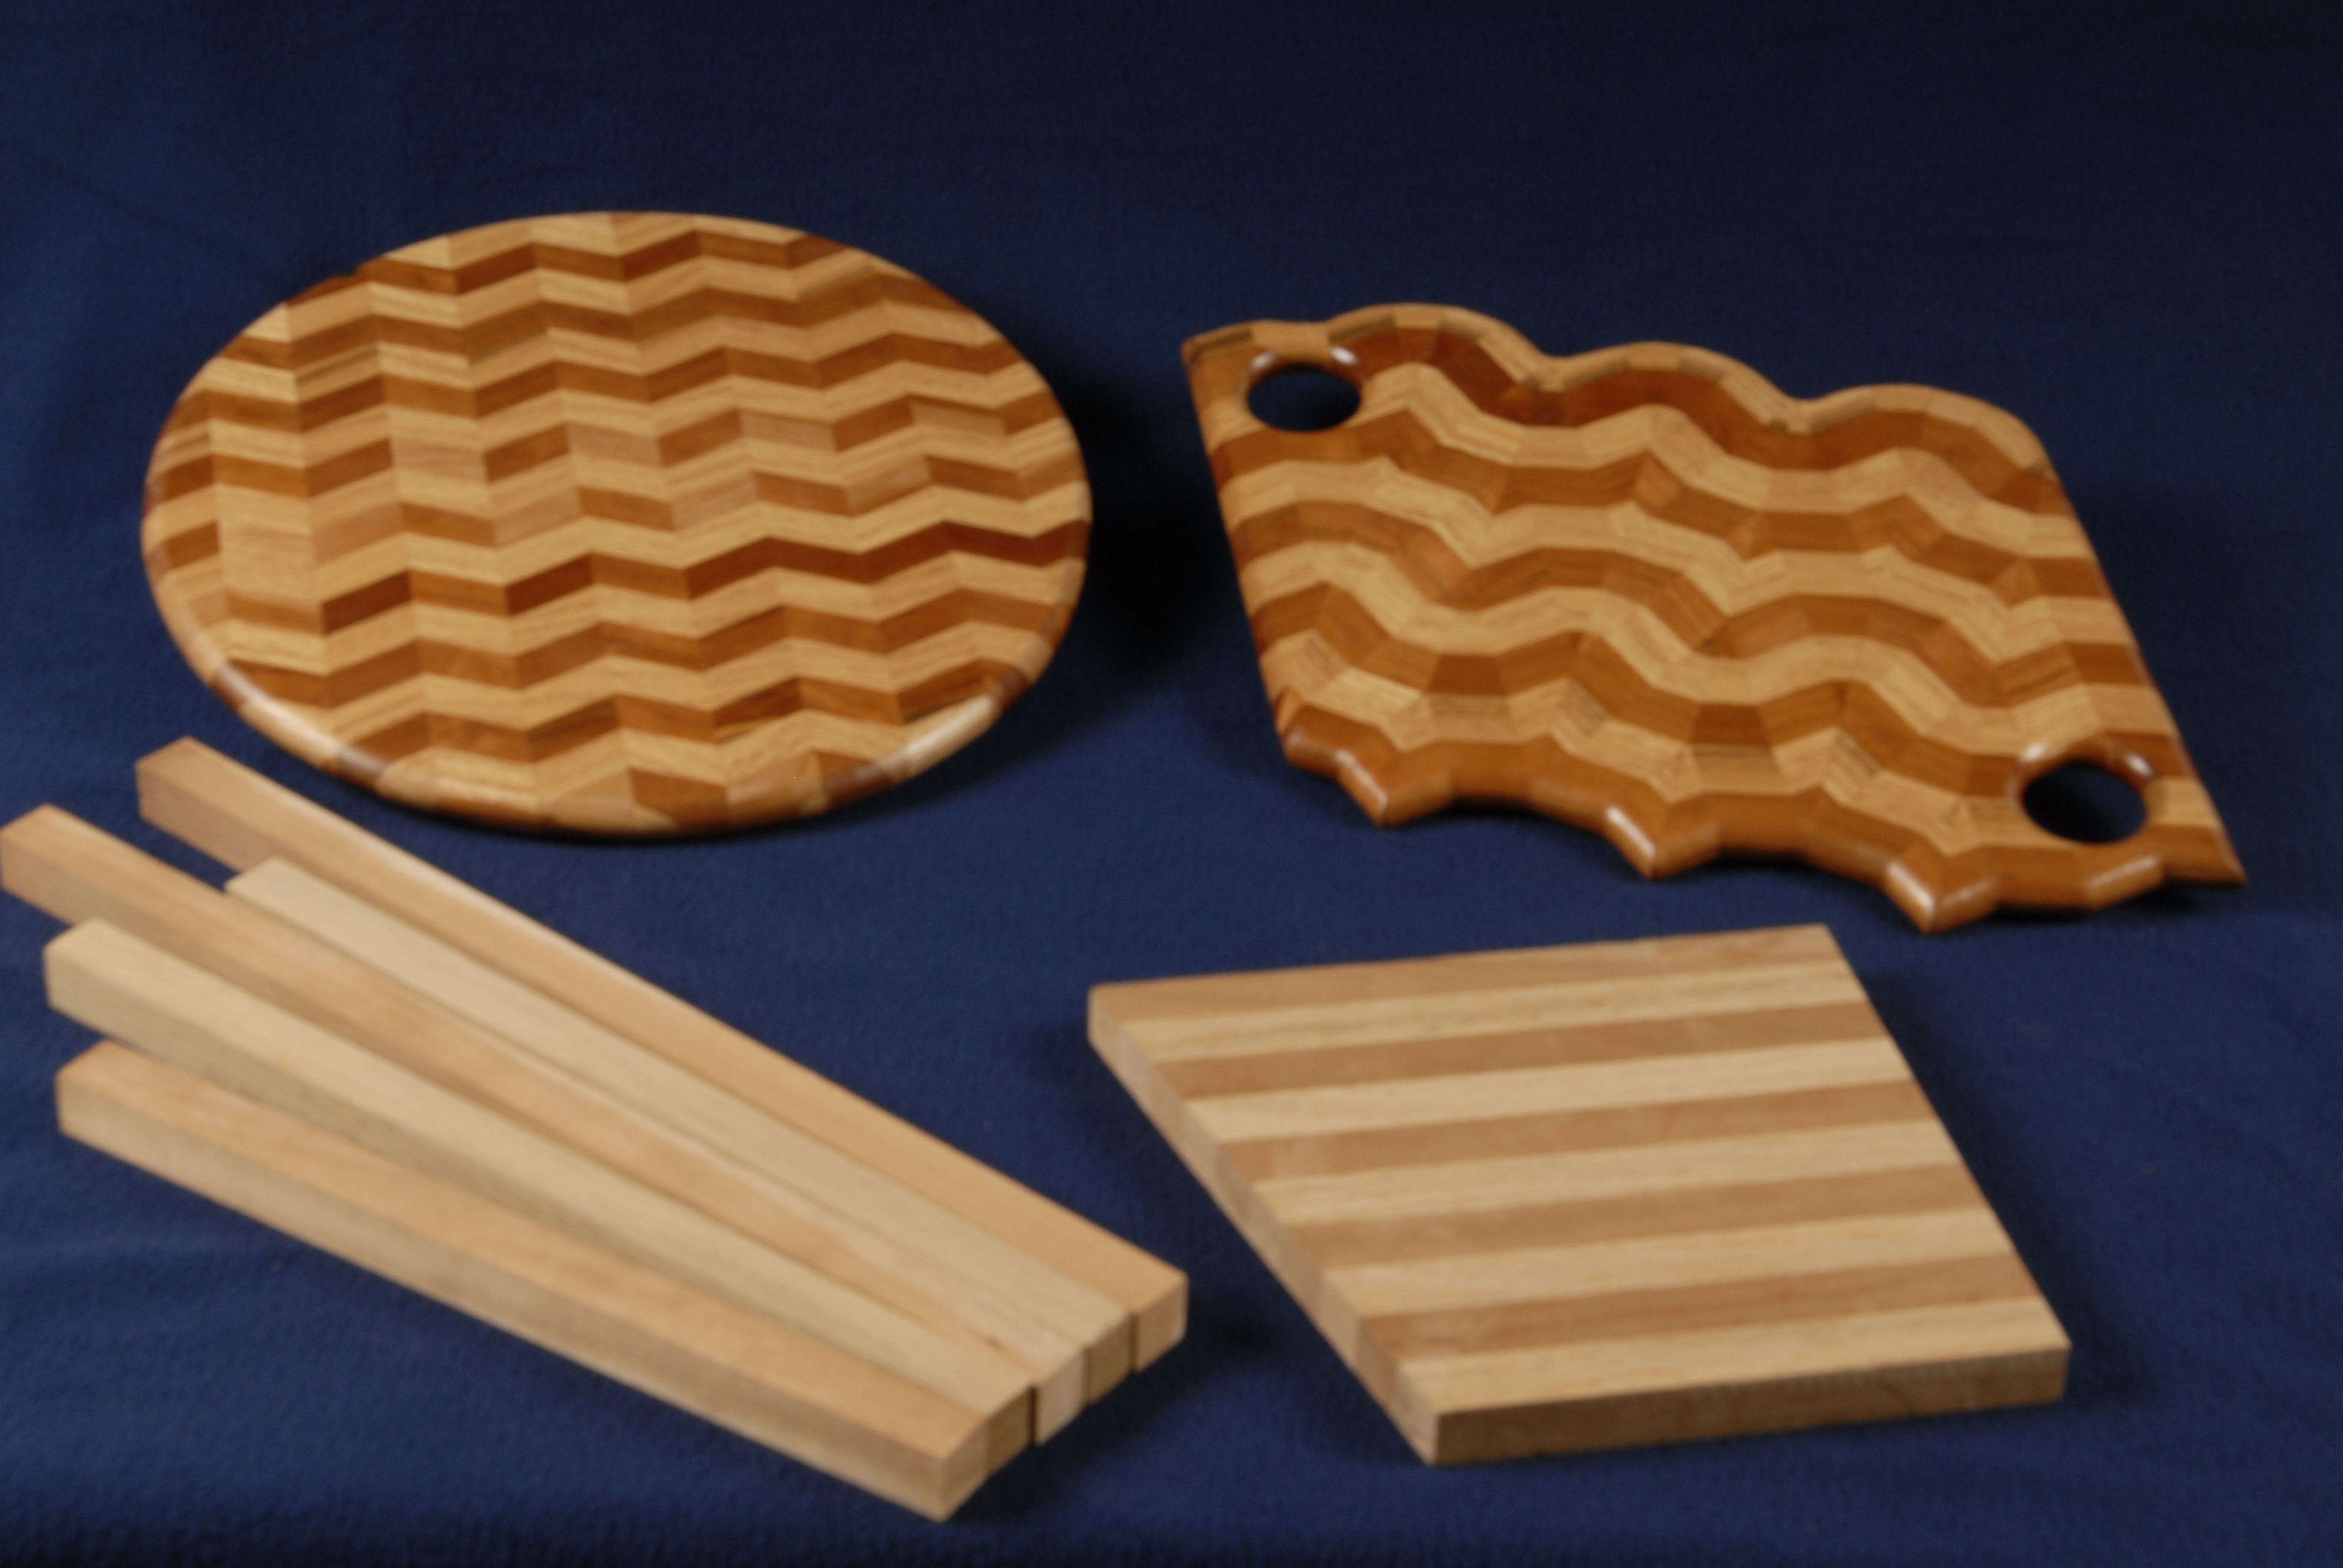
Believe it or not these designs are made with the same material and with the same construction method. The diamond orientation differs, but the parts and pieces are the same. On the left you see the vertical or linear orientation and on the right a circular design. The difference from top to bottom is simply different finishing techniques which can be employed. These 4 designs represent a small fraction of what is possible in variation and expression in the endless array of designs possible using this technique. While working on one design I am taking notes on the next 4 projects I want to try.
With these lamination projects we are focusing not on making something in particular rather, we are ‘making something to make something’. To create the above material is a wonderful beginning to a beautiful …..  whatever. Whether lazy Susan, cutting board, platter or a vase, bowl or plate all would be fitting uses for this wonderful, colorful material. For all woodworkers whether you have a lathe or not, this type of project is nothing but fun. For our purposes we will focus on the making of these blanks above and allow the wind to carry your application of it where it will. I beg you though, comment and let me know how you were able to apply these techniques.
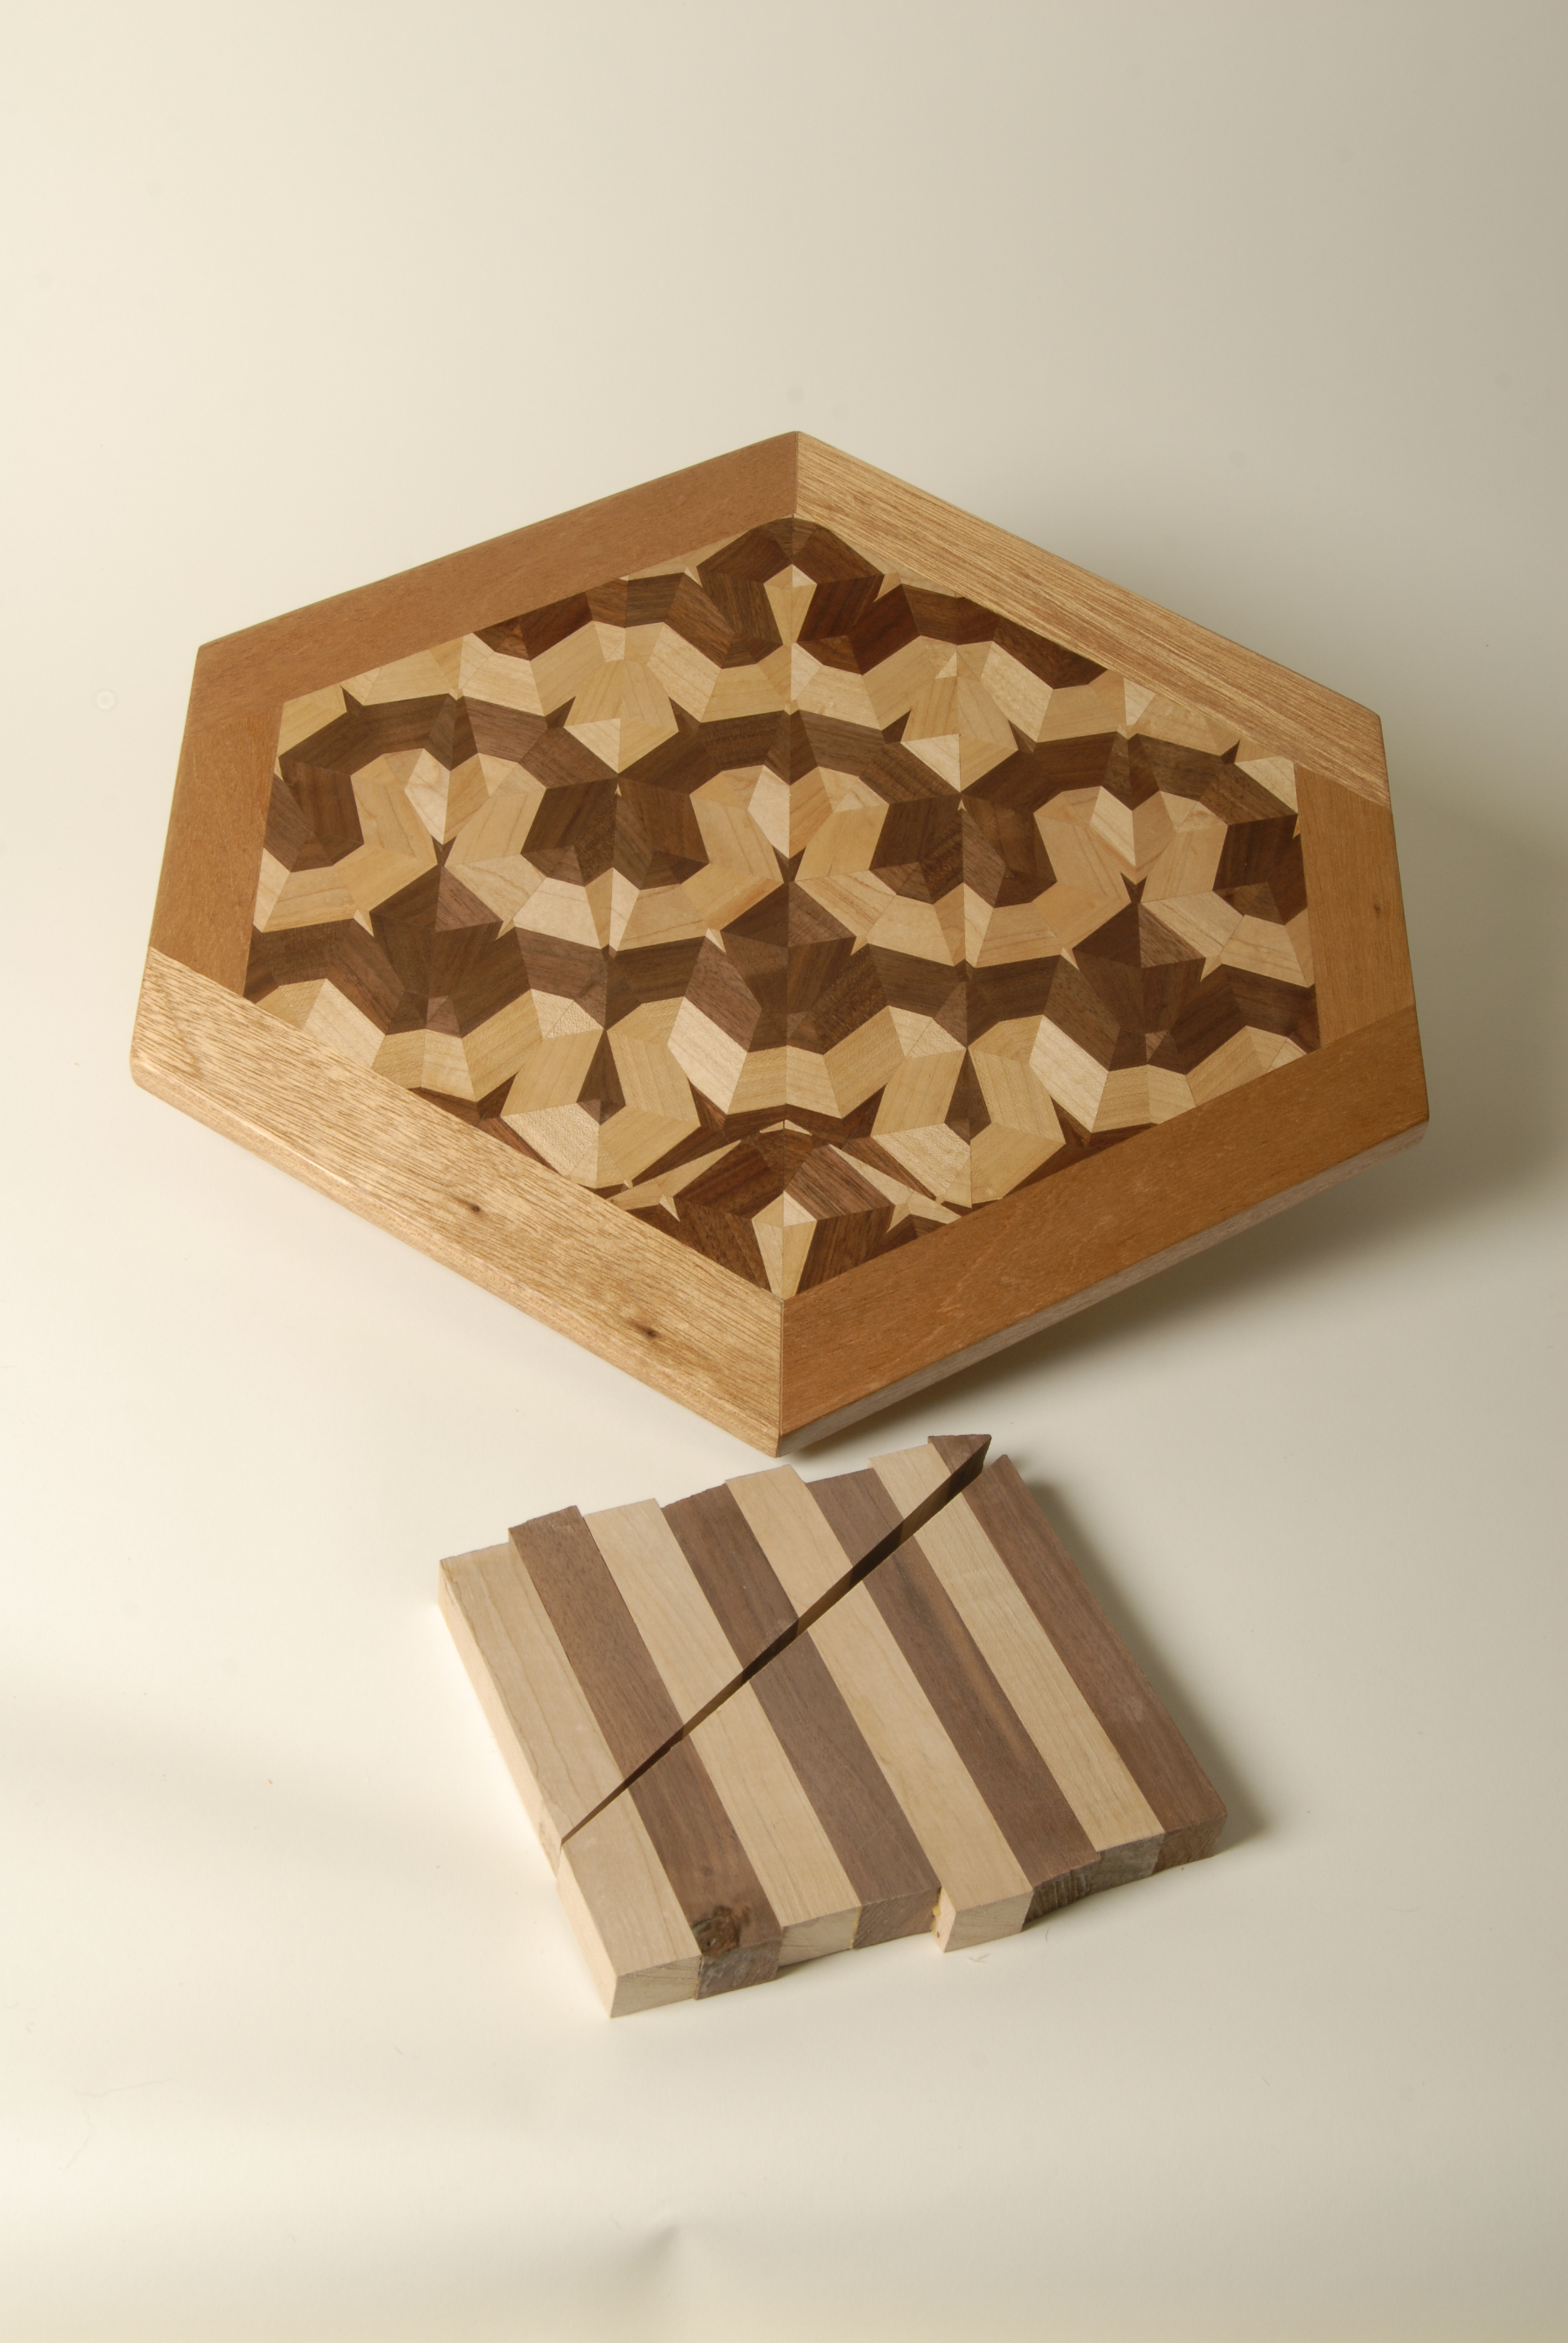
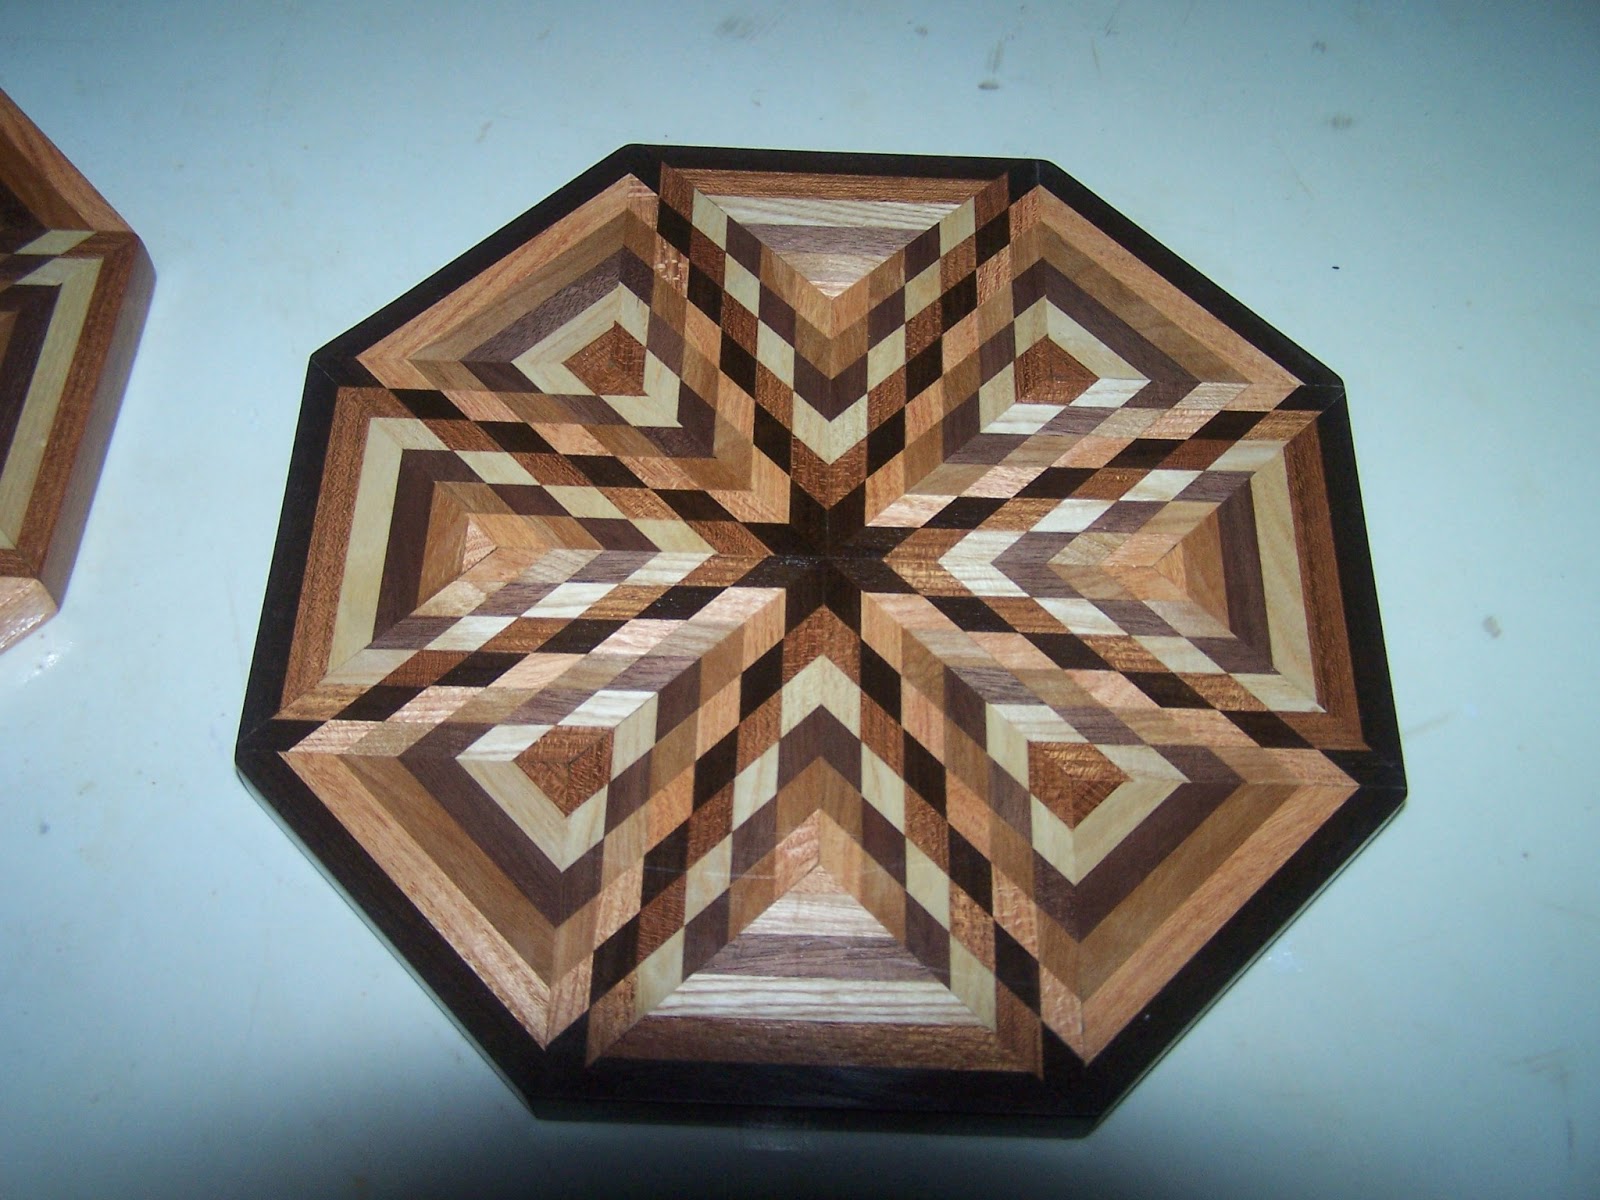
First we need to determine how many varied colors and wood types to involve. I have chosen 6 for this project but 4 is a better number to start with as with my first try at this seen above. Here the diamonds are larger and easier to work with but it uses 4 types of wood with the same basic circular 8 pointed star pattern.
 As with all these types of projects its success is centered on all the material being the same width and thickness. Also best results come from using wood with a similar density and relative hardness. Combining poplar or pine with Iron wood or purple heart is not recommended. The material must be spot on in dimensions and be sure and make up twice as much as you think you’ll need.
Above you see I have milled up cherry, ash, walnut, black locust, Brazilian cherry and Brazilian walnut. The more contrast in the wood the better the woods augment each other and the designs stand out.
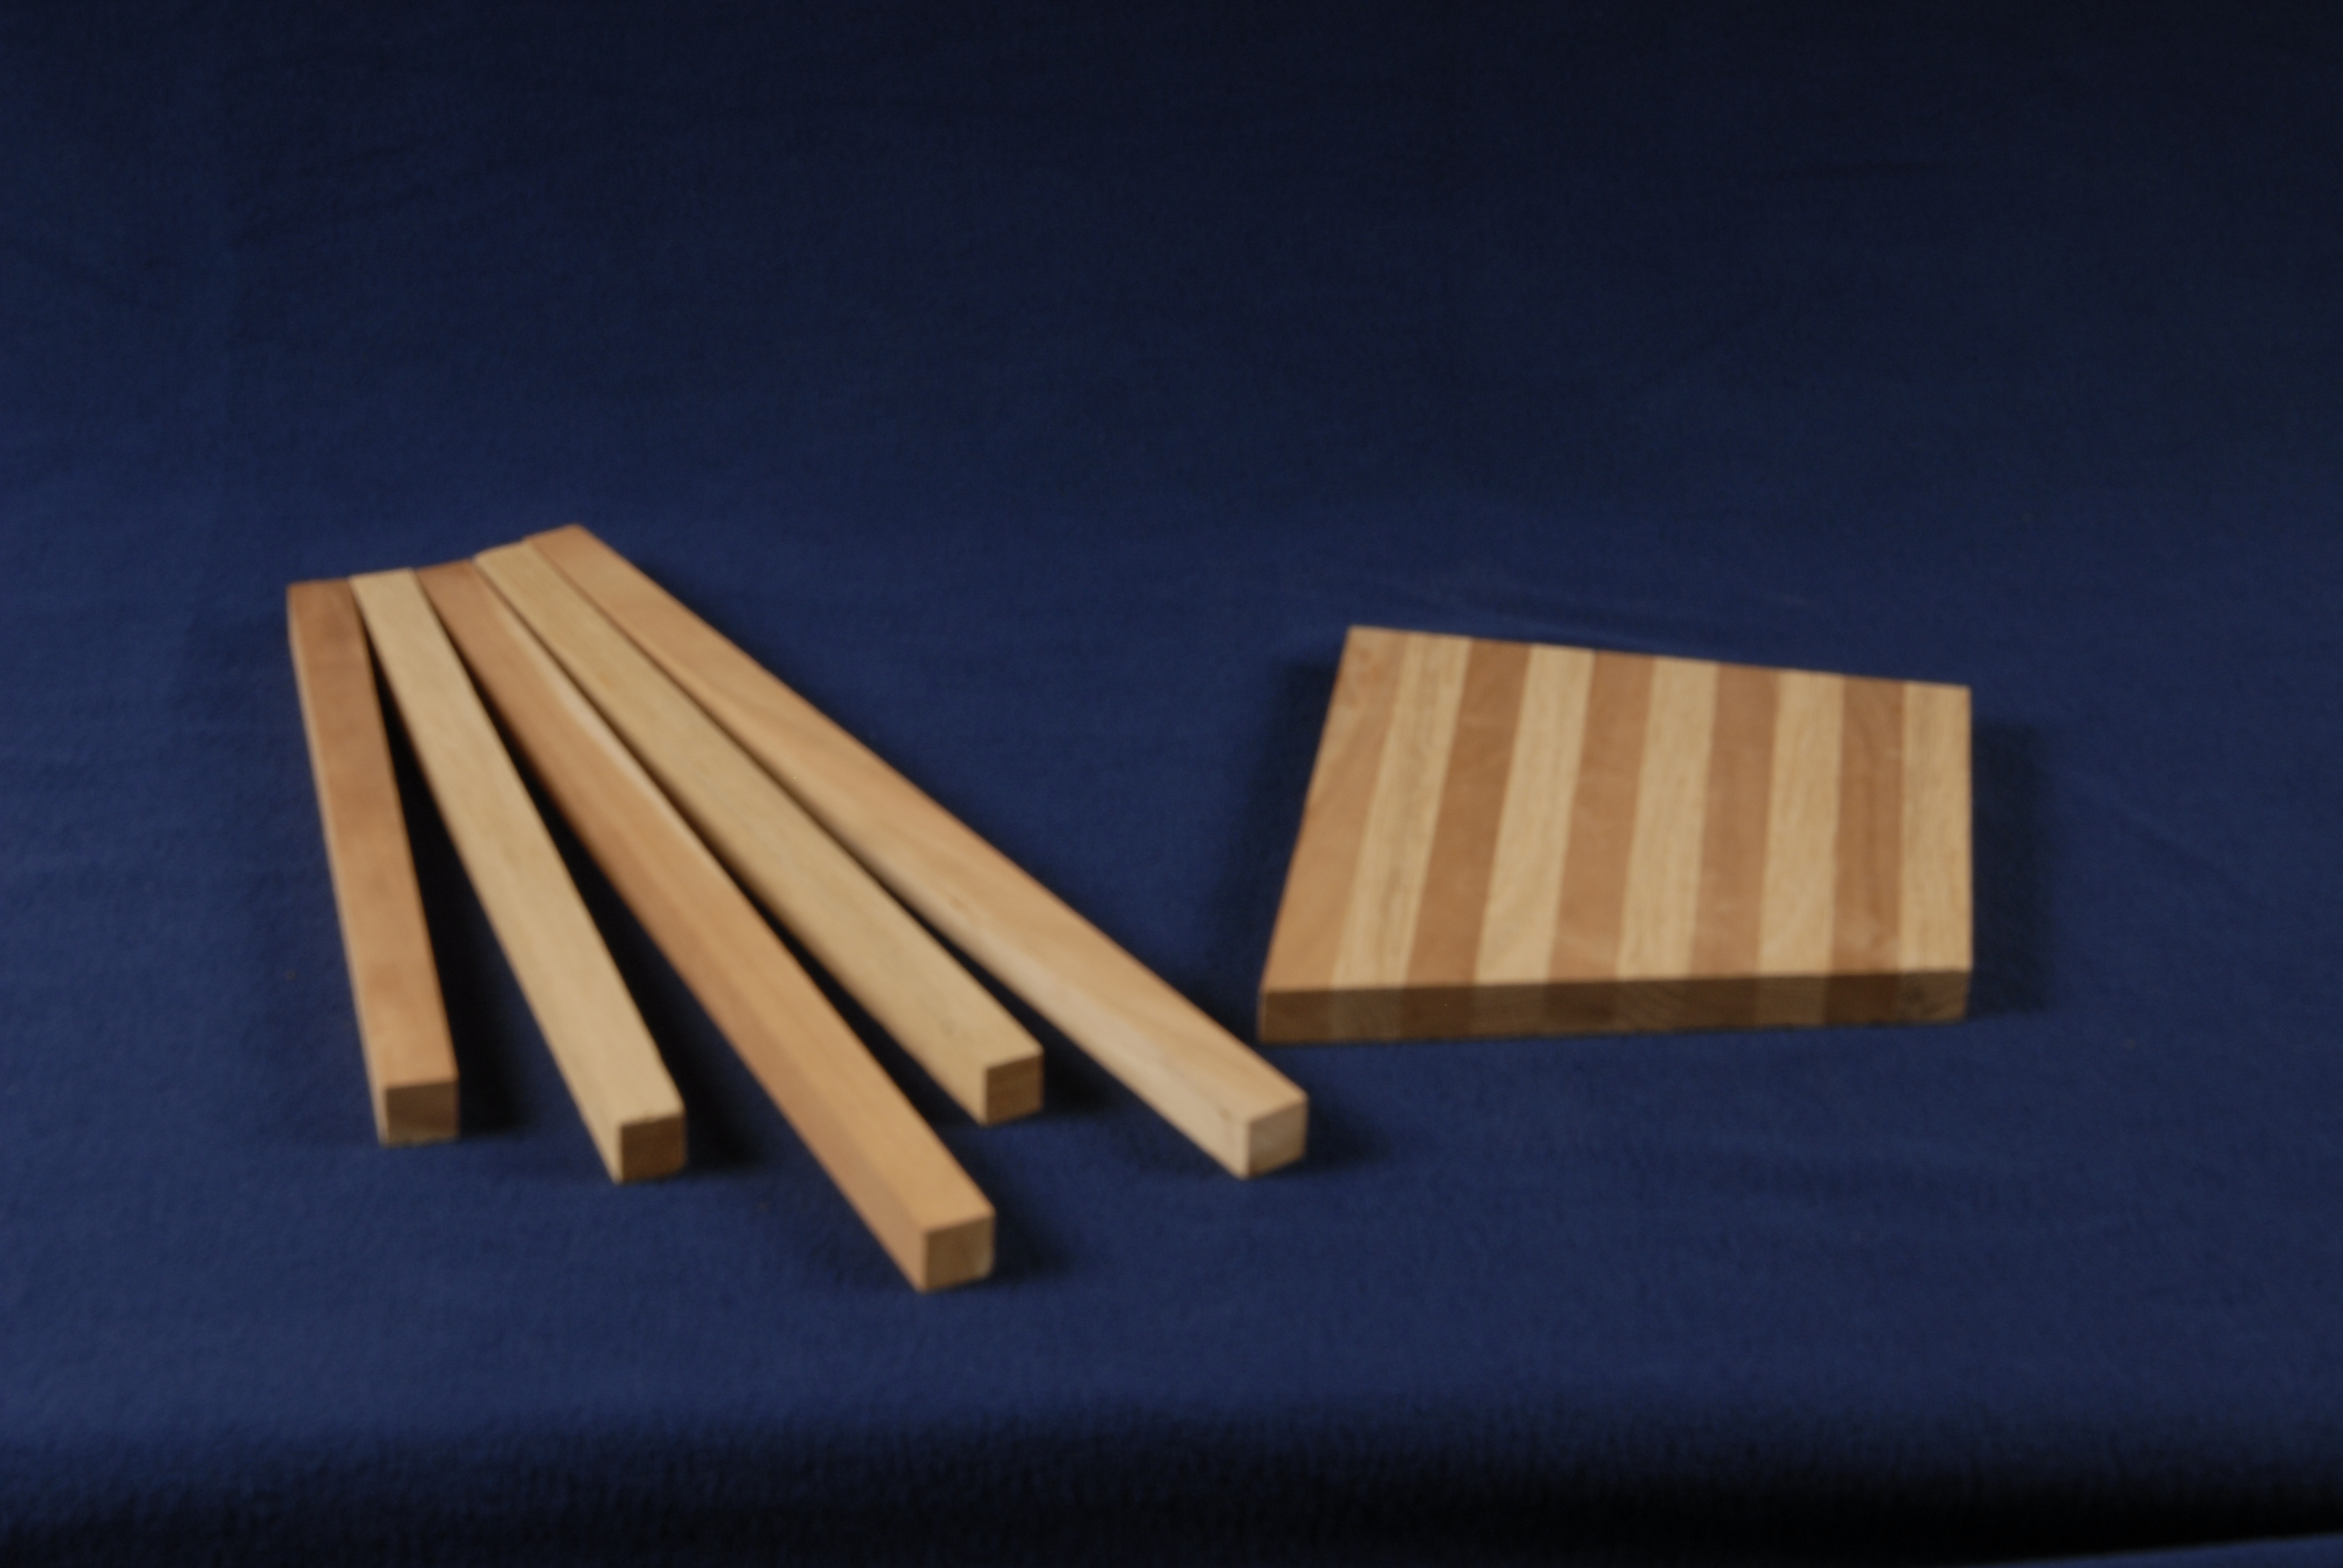
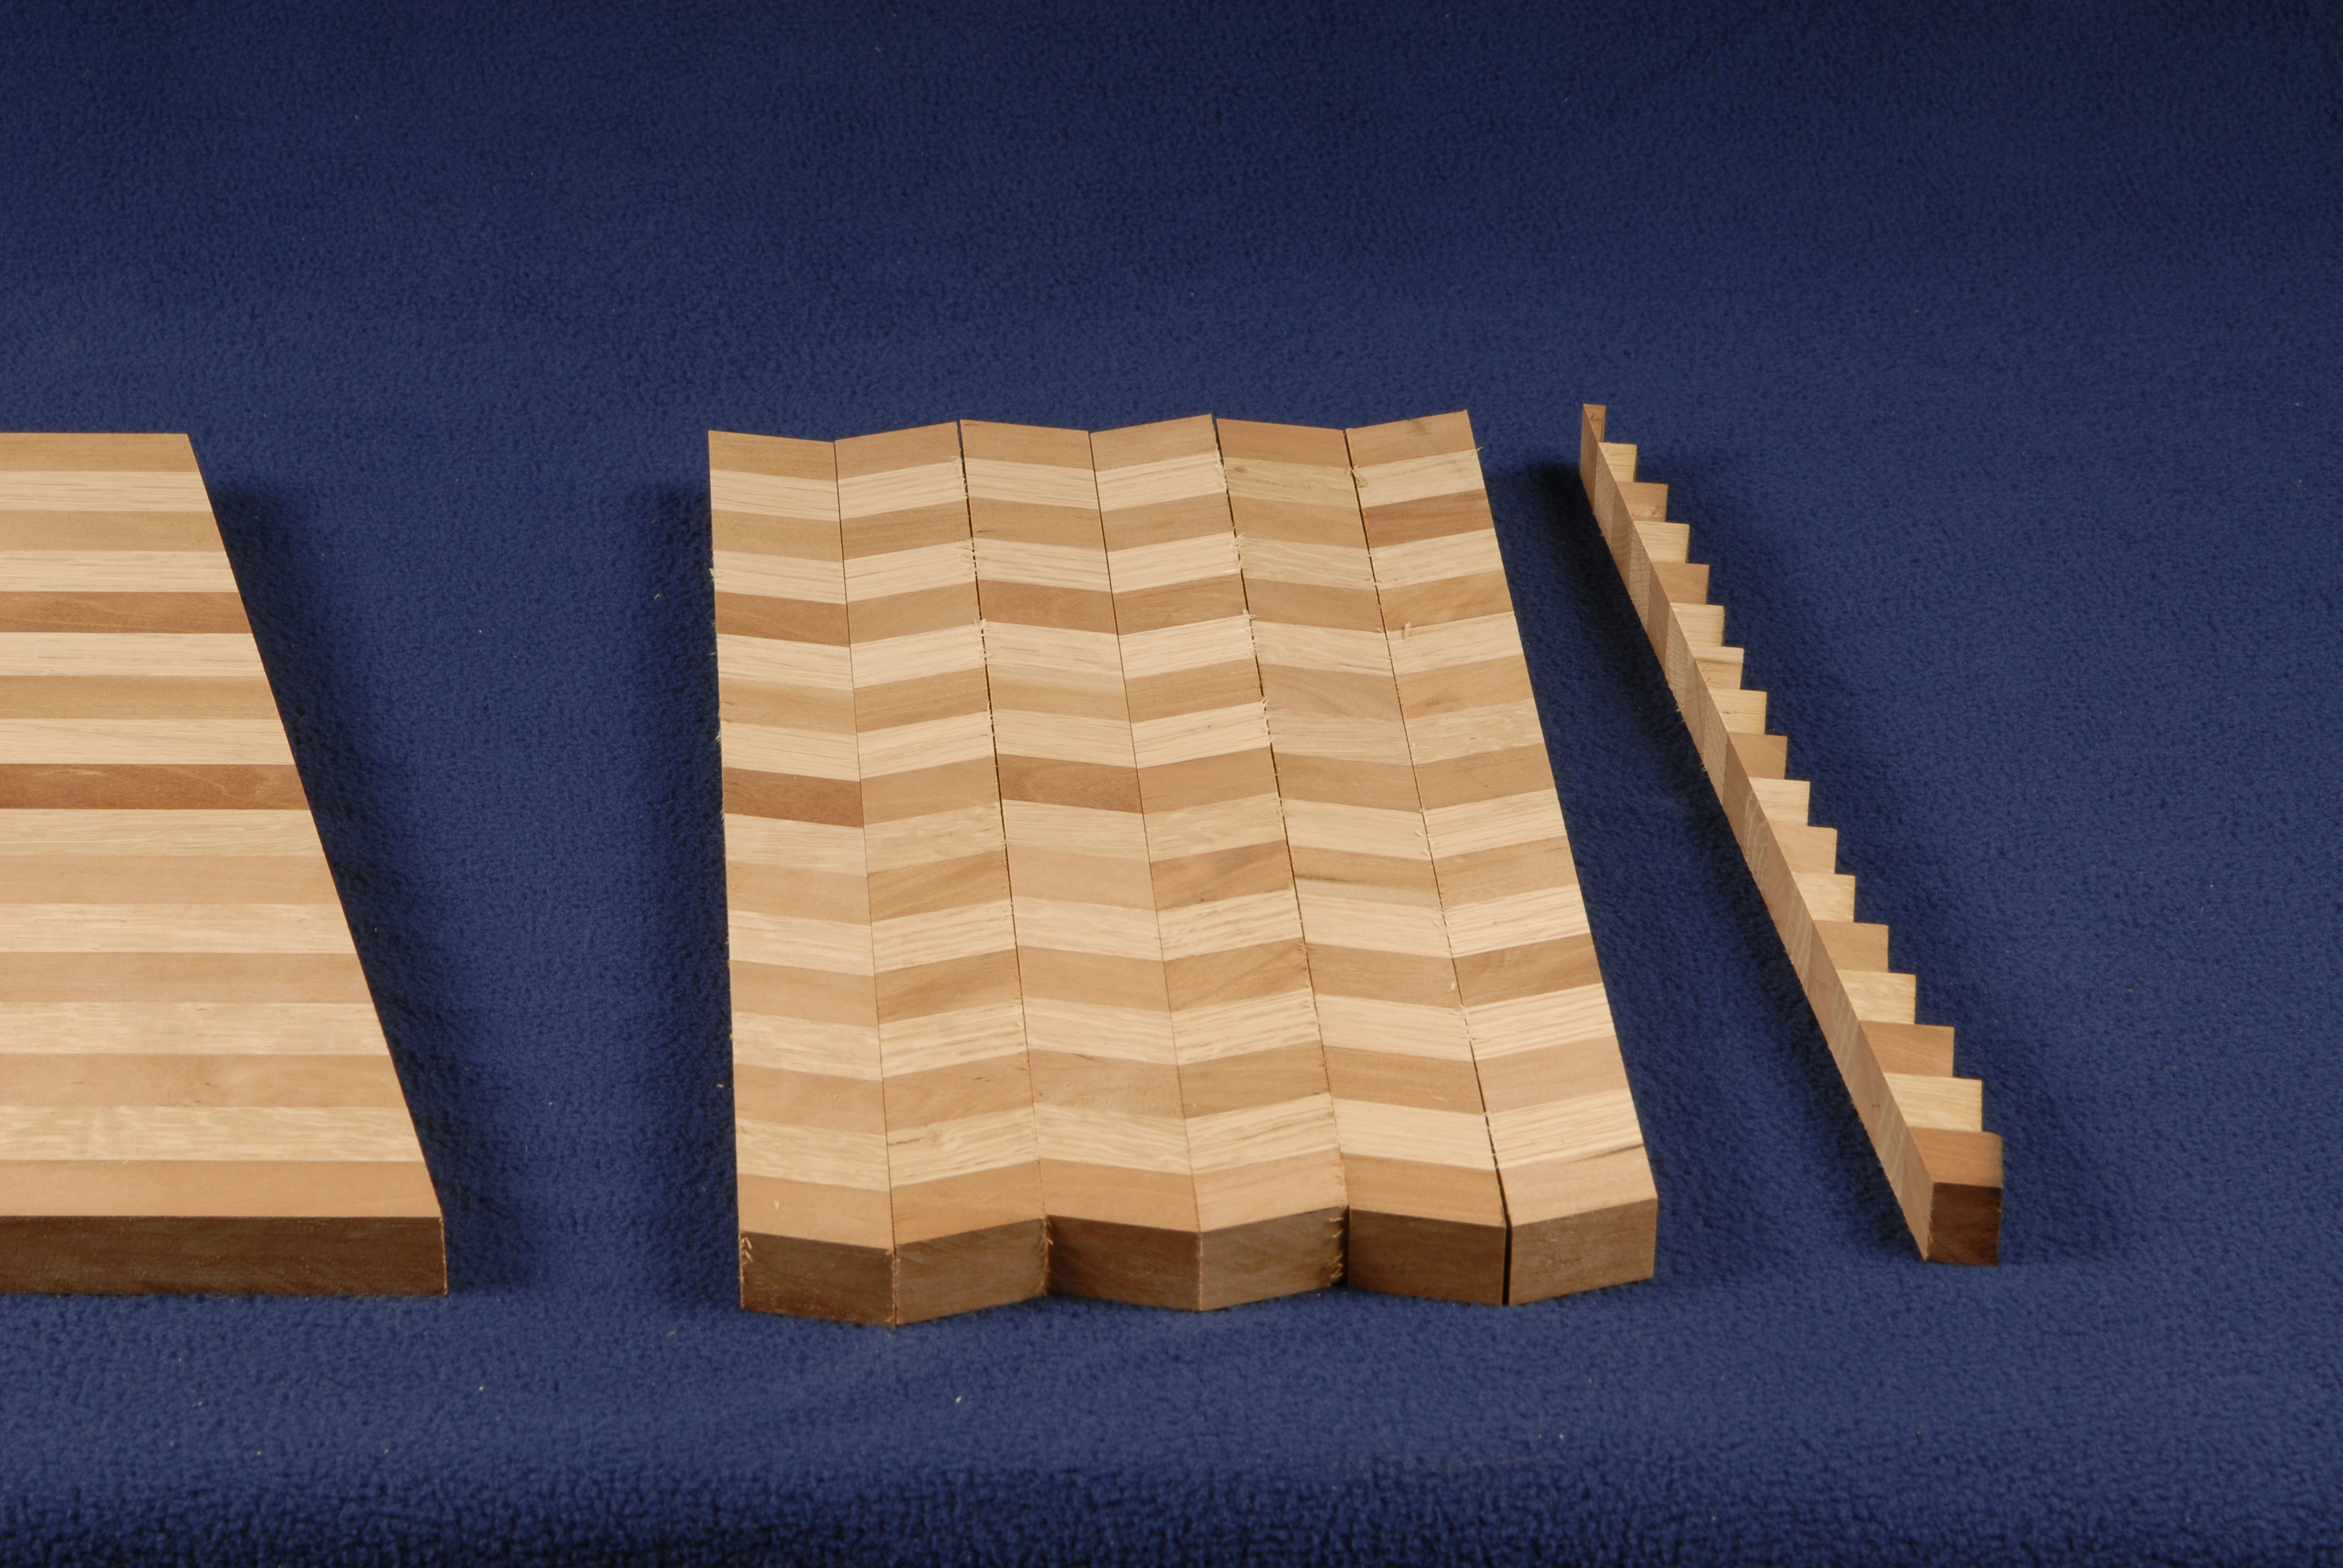
With the material milled we can begin to make the first generation lamination. These six are laminated together as below.
Notice here that each lamination is different. Each one in sequence moves the top most wood to second position and the bottom wood to the first position. Thus you are making six sequenced laminations. Follow the darkest wood and you will see that with each of the six glue-ups it is in a different position. They are ordered in a step fashion.
Now that our material is ready let’s get started.
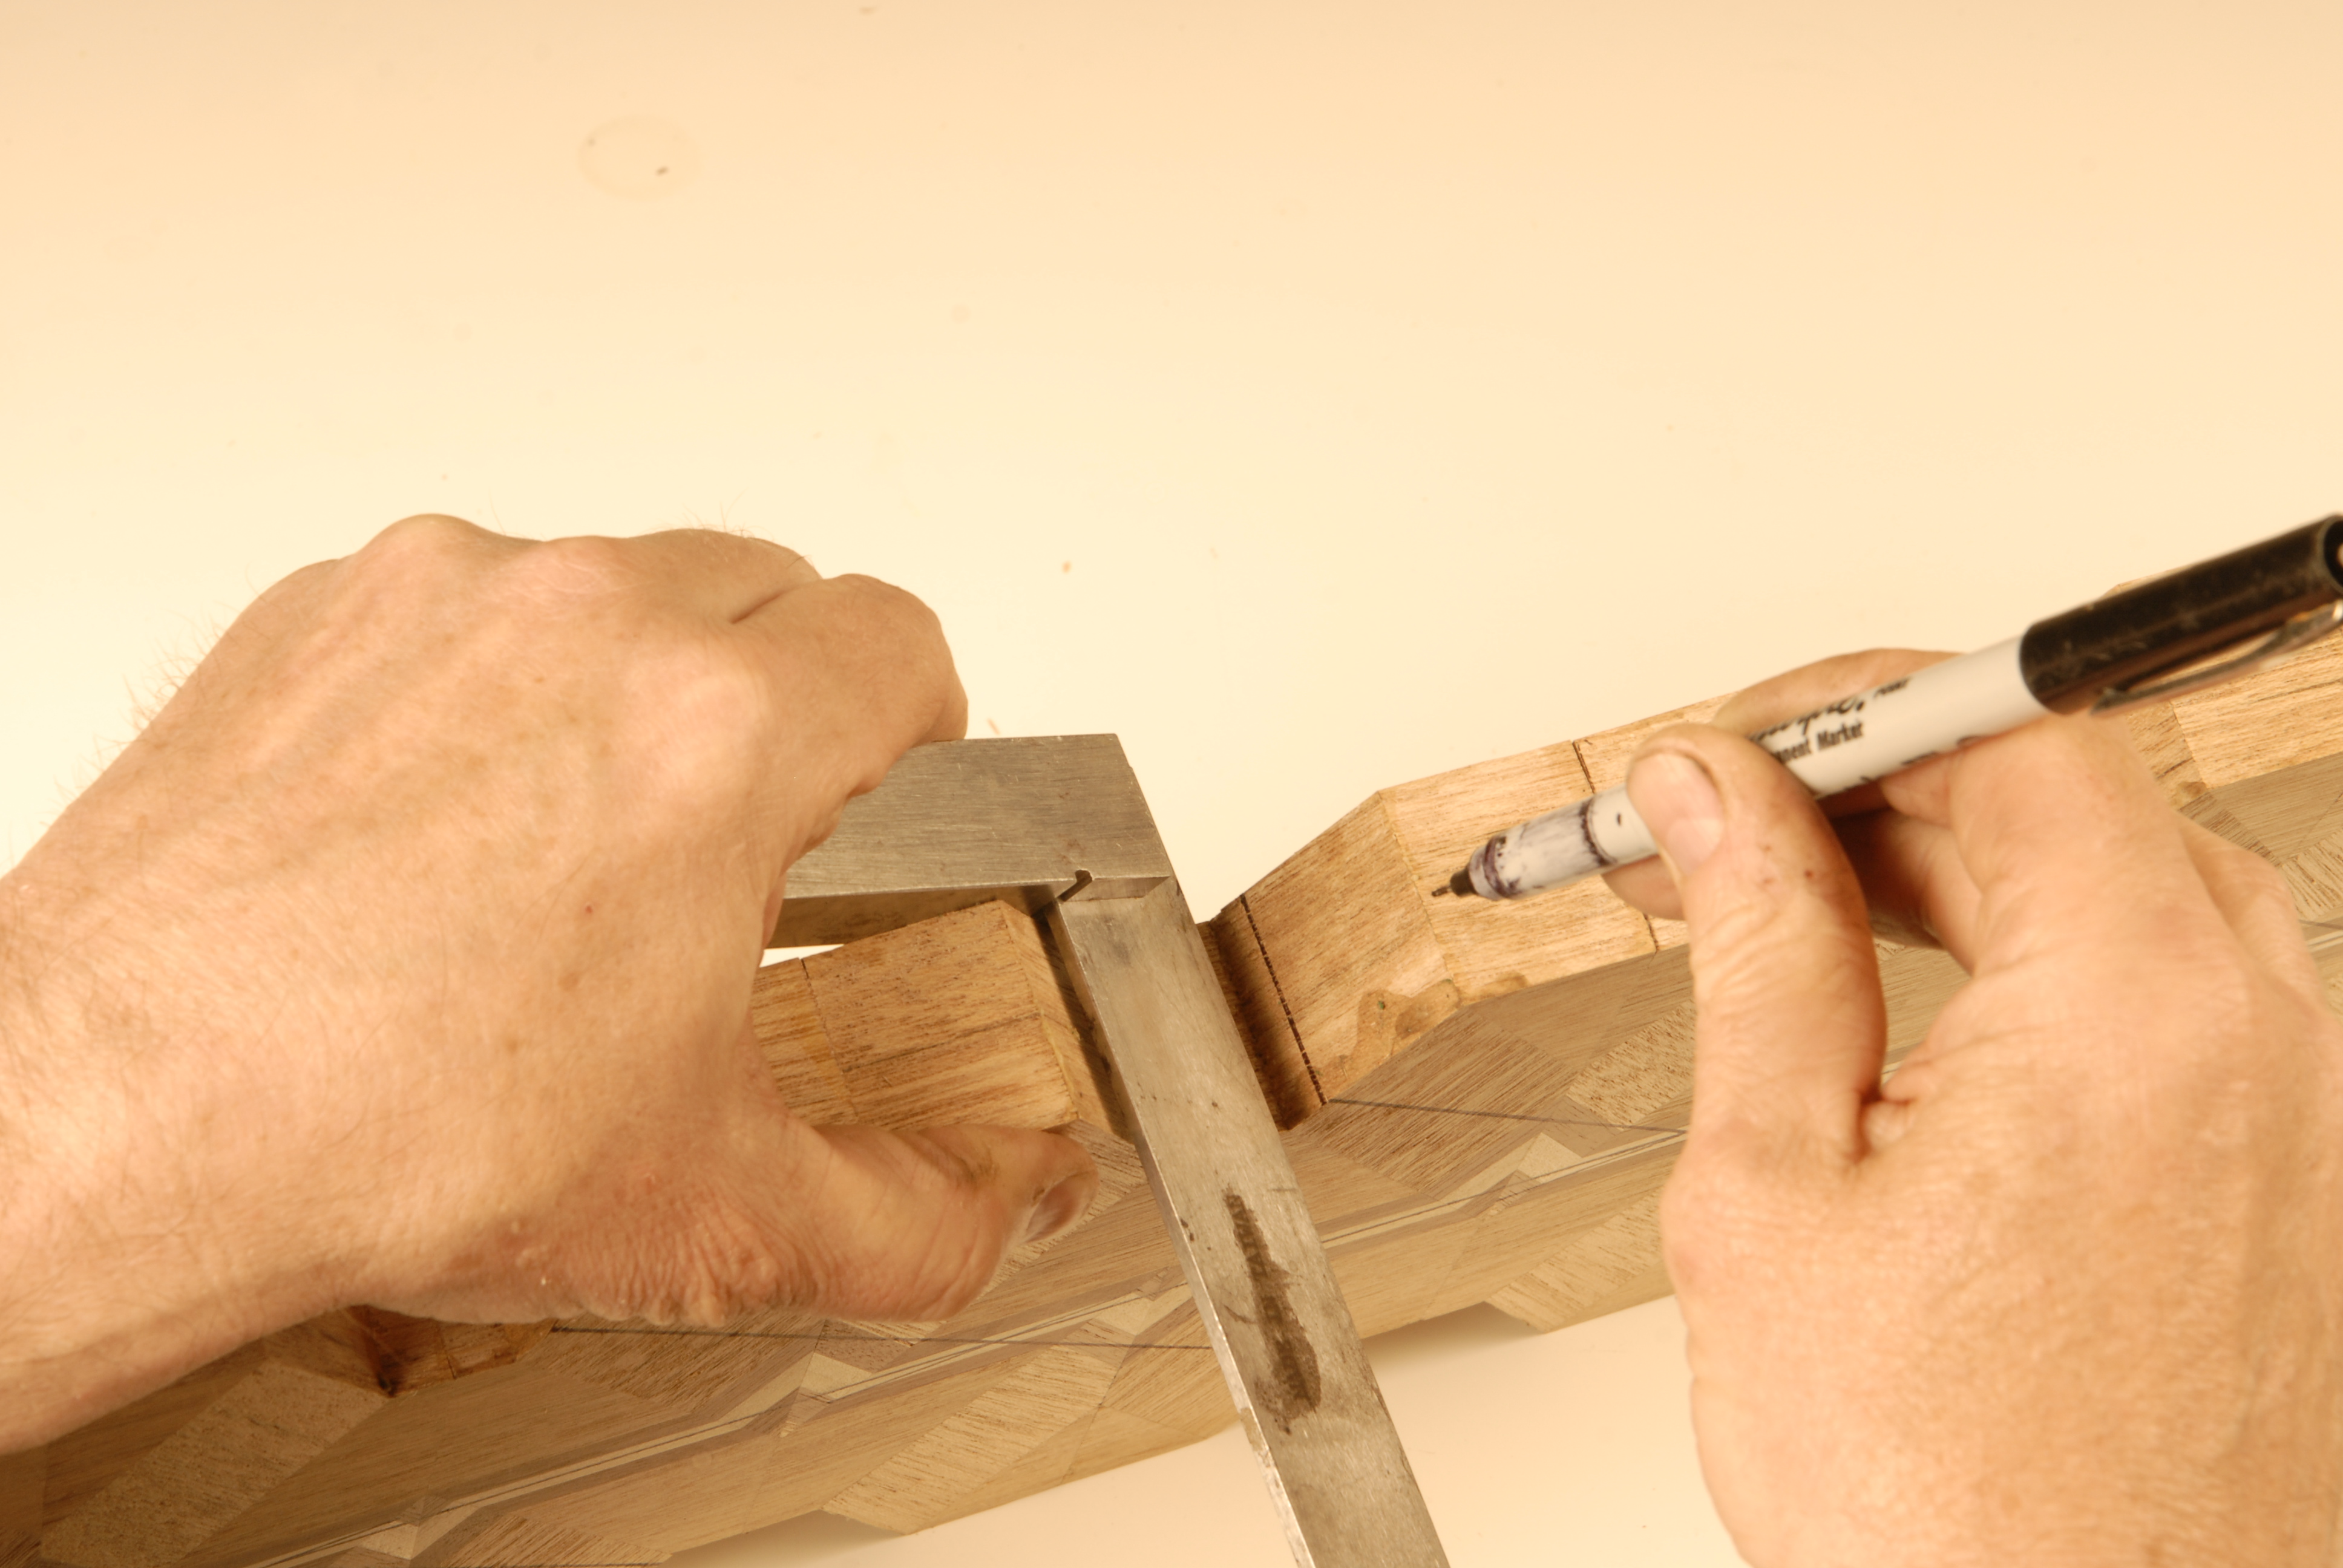
What is a diamond?
There are many ways to answer that question but for our purposes, diamonds share a common length along each of its 4 edges, like a square whose top has been pushed over by the wind. Now this sounds easy but it is not. In order to accomplish this you need to pay close attention to the width of the material because the width will determine the length of the 2 edges which are along the cut or mitered sides.
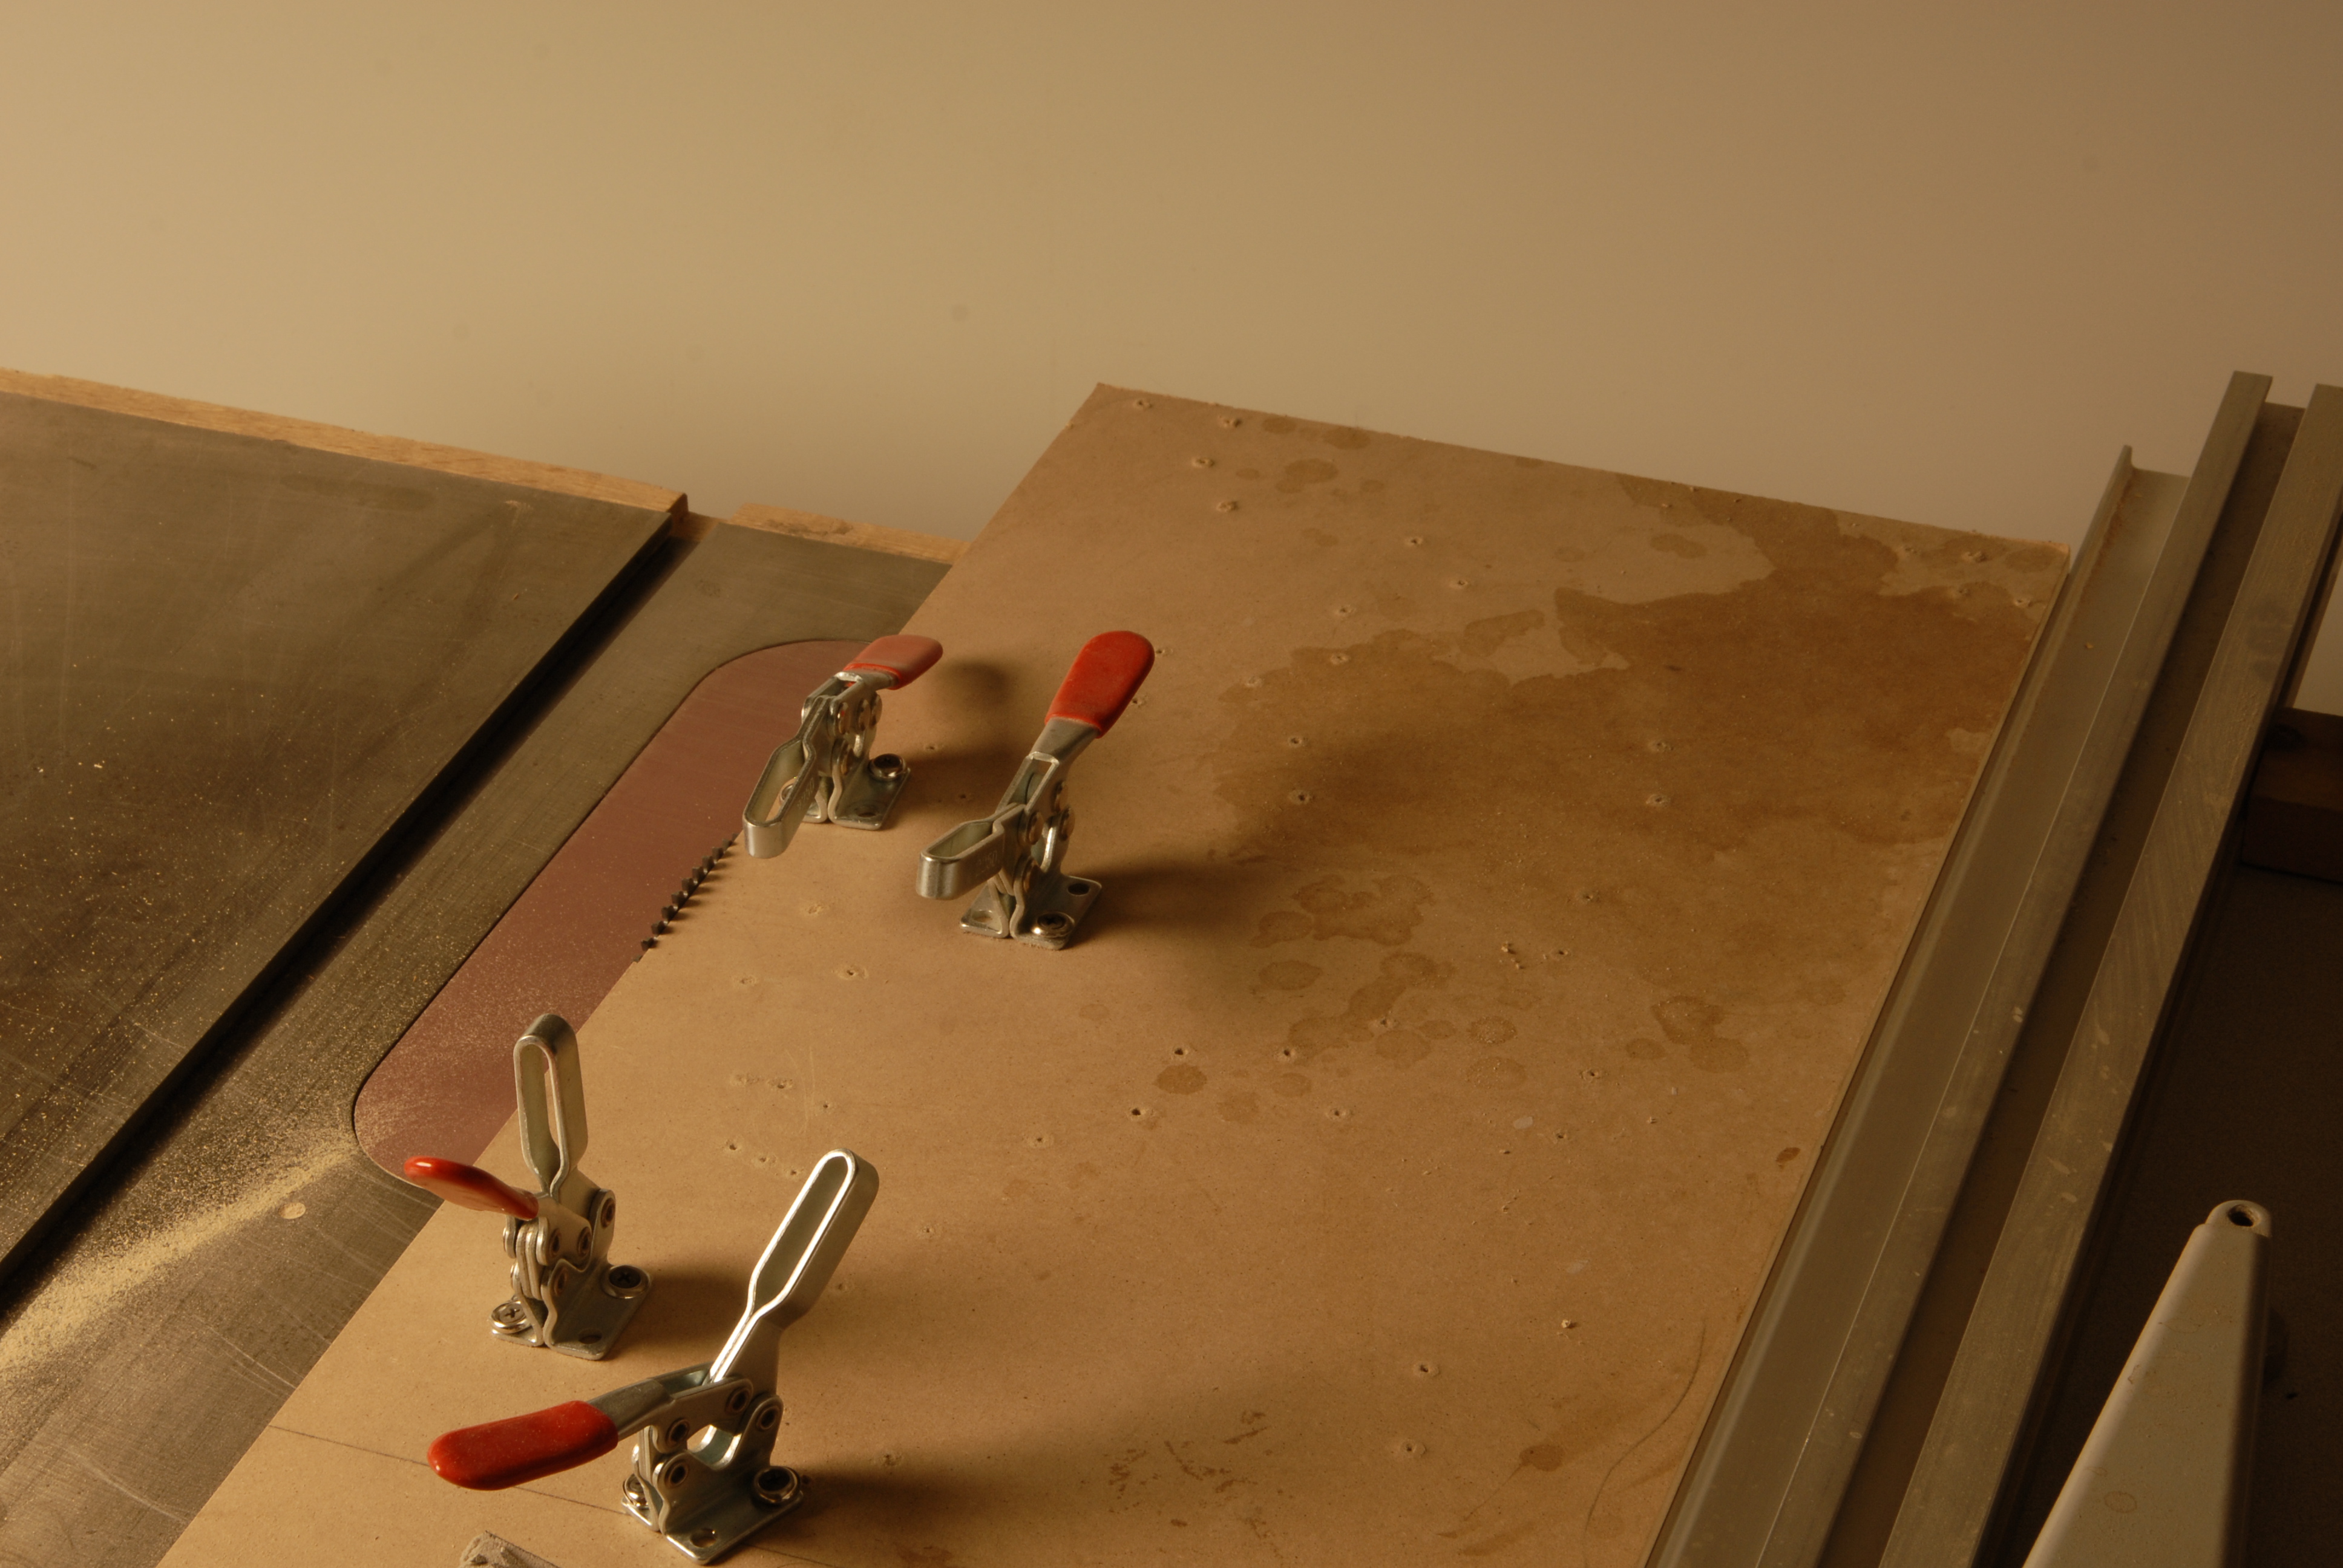
Your project will be determined by the center set of diamonds in the round. Like building any round object we begin from the center and work out. Here we are looking at 8 diamonds all pointed to the center. 8 divided by 360 degrees is 45. So each piece will contain 45 degrees. Since each diamond has 2 sides which connect on the edges moving towards the center we will divide the 45 degrees evenly for a diamond with all its edges at 22.5 degrees. That is pretty much the end of the math. This math can apply to any number of center pieces. For example , 10 center pieces at 36 degrees each with cuts at 18 degrees. The difficulty is in getting a perfect cut from your table saw miter jig or your miter saw. Practice and cut scrap until you have a perfect 8 pointed star with no gaps or spaces on the interior or exterior. Remember , cumulative error is to be avoided, so the time you spend getting it cut just so , pays off down the road.
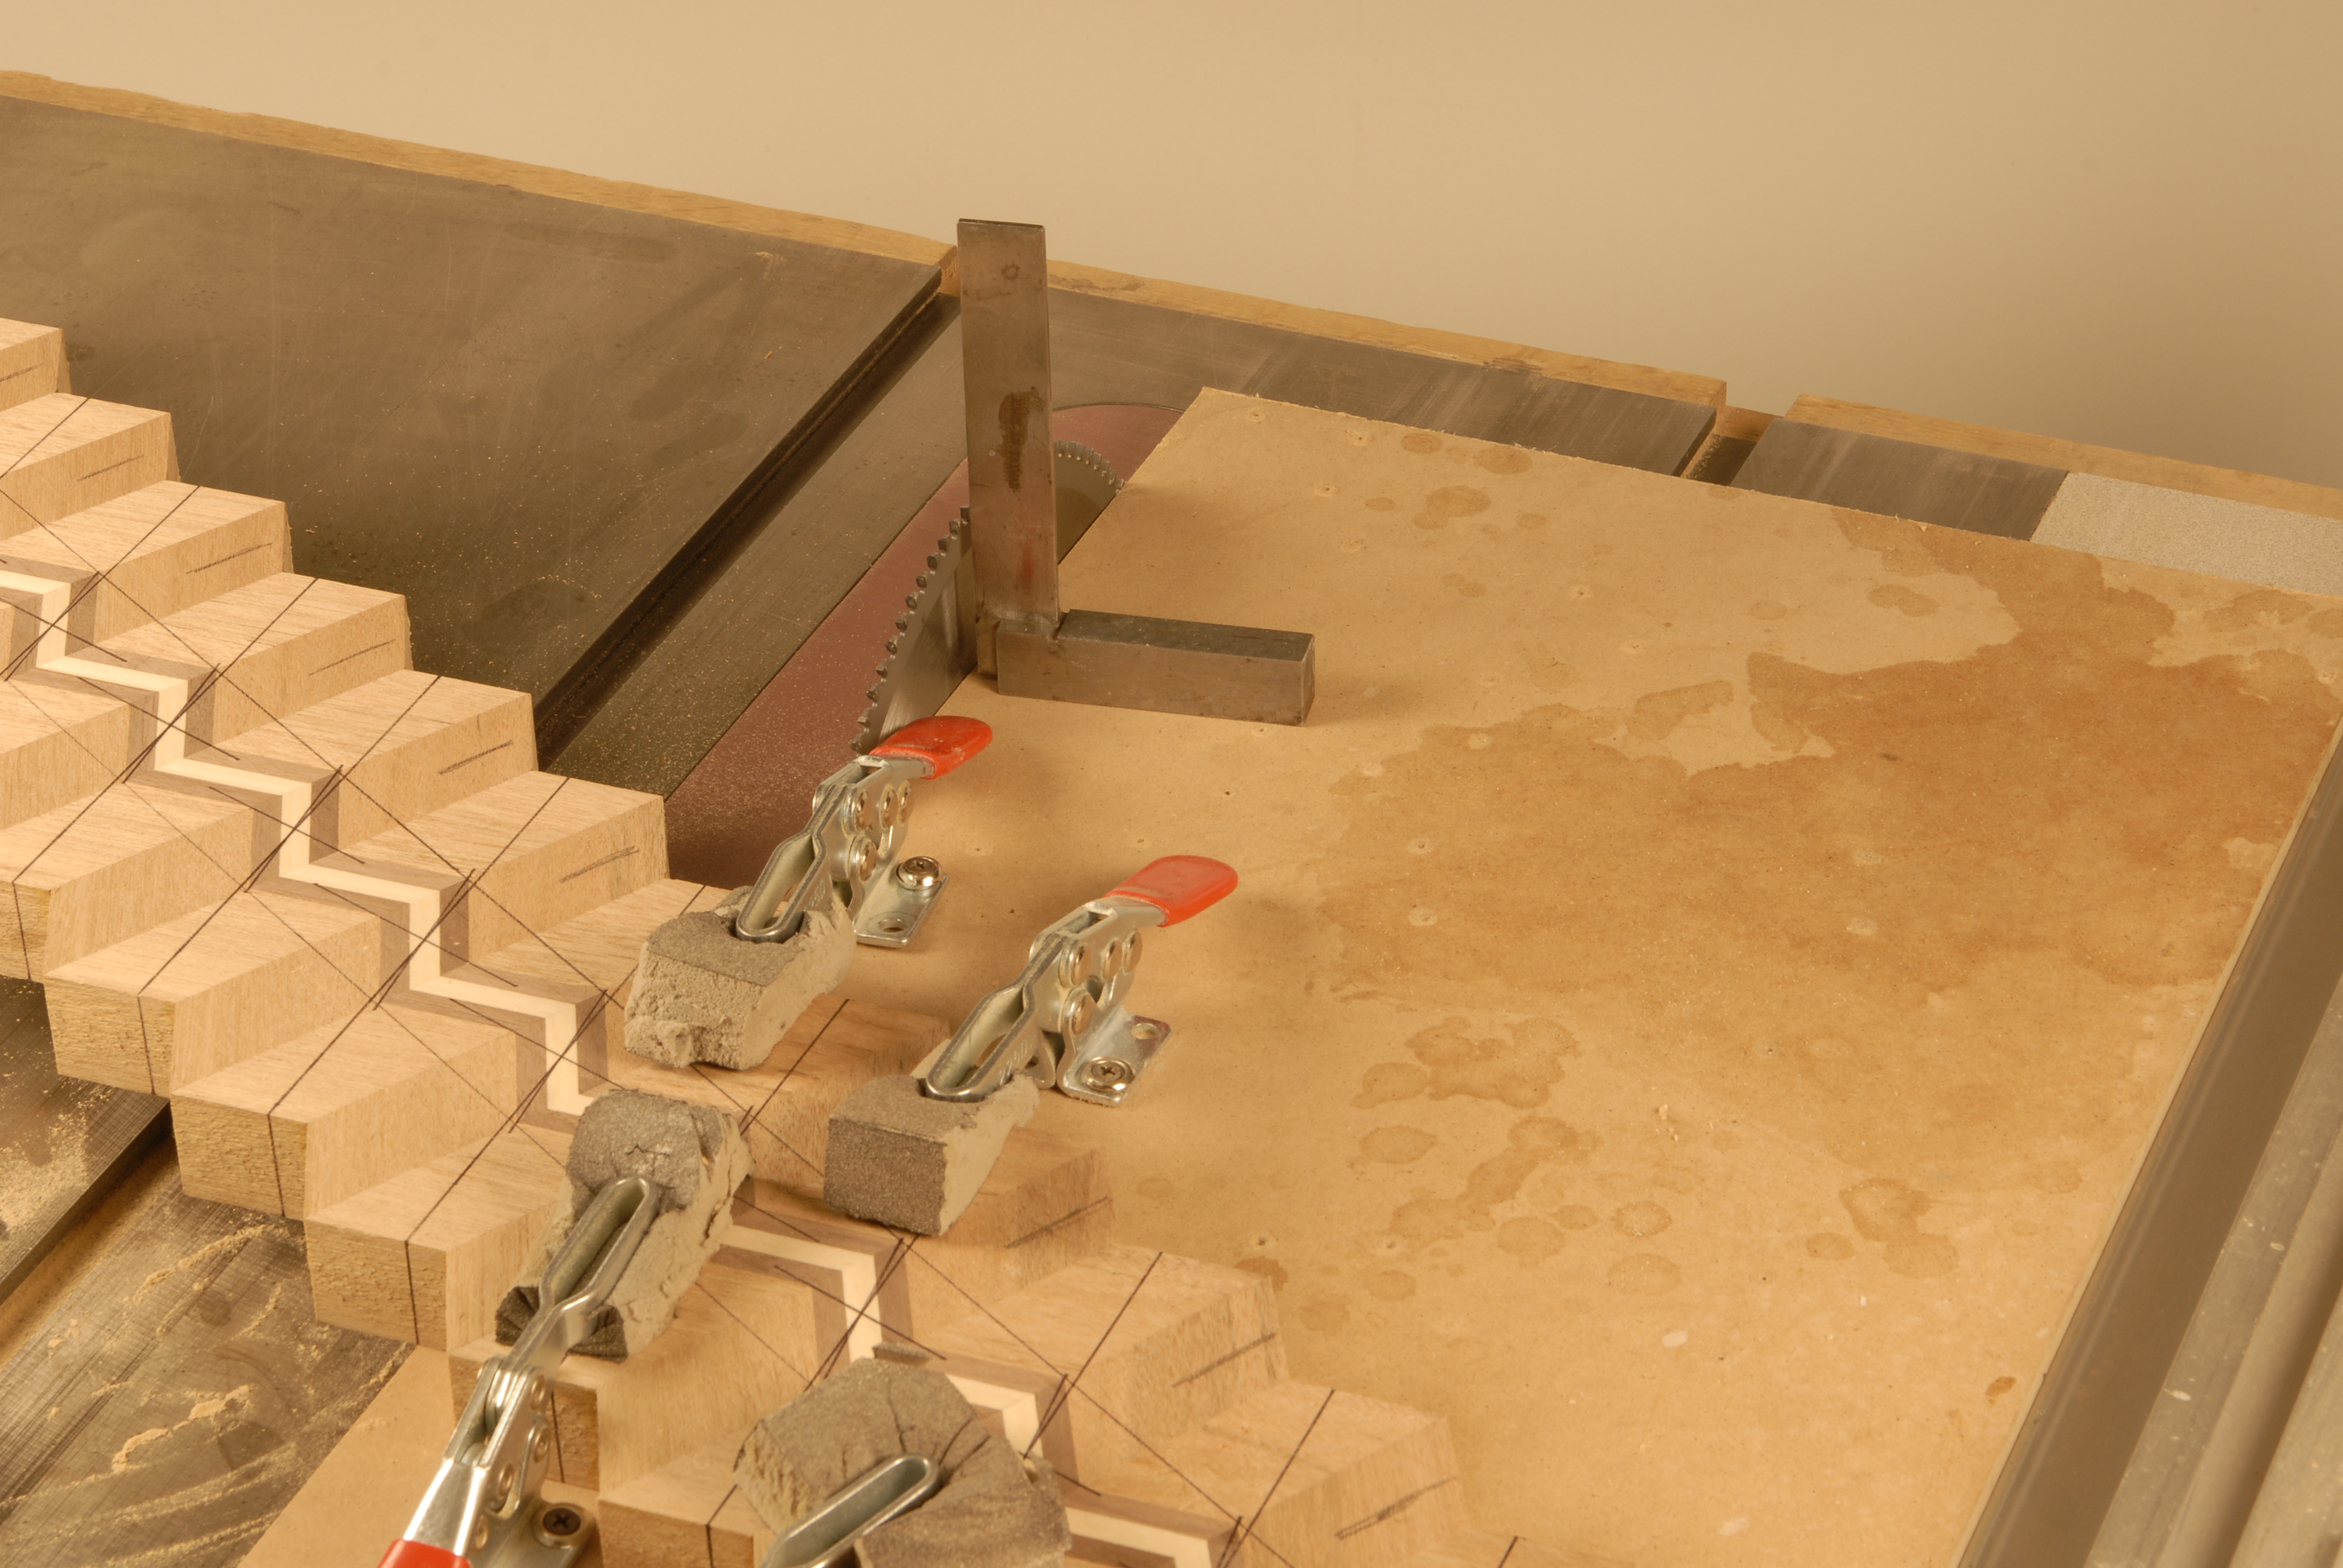
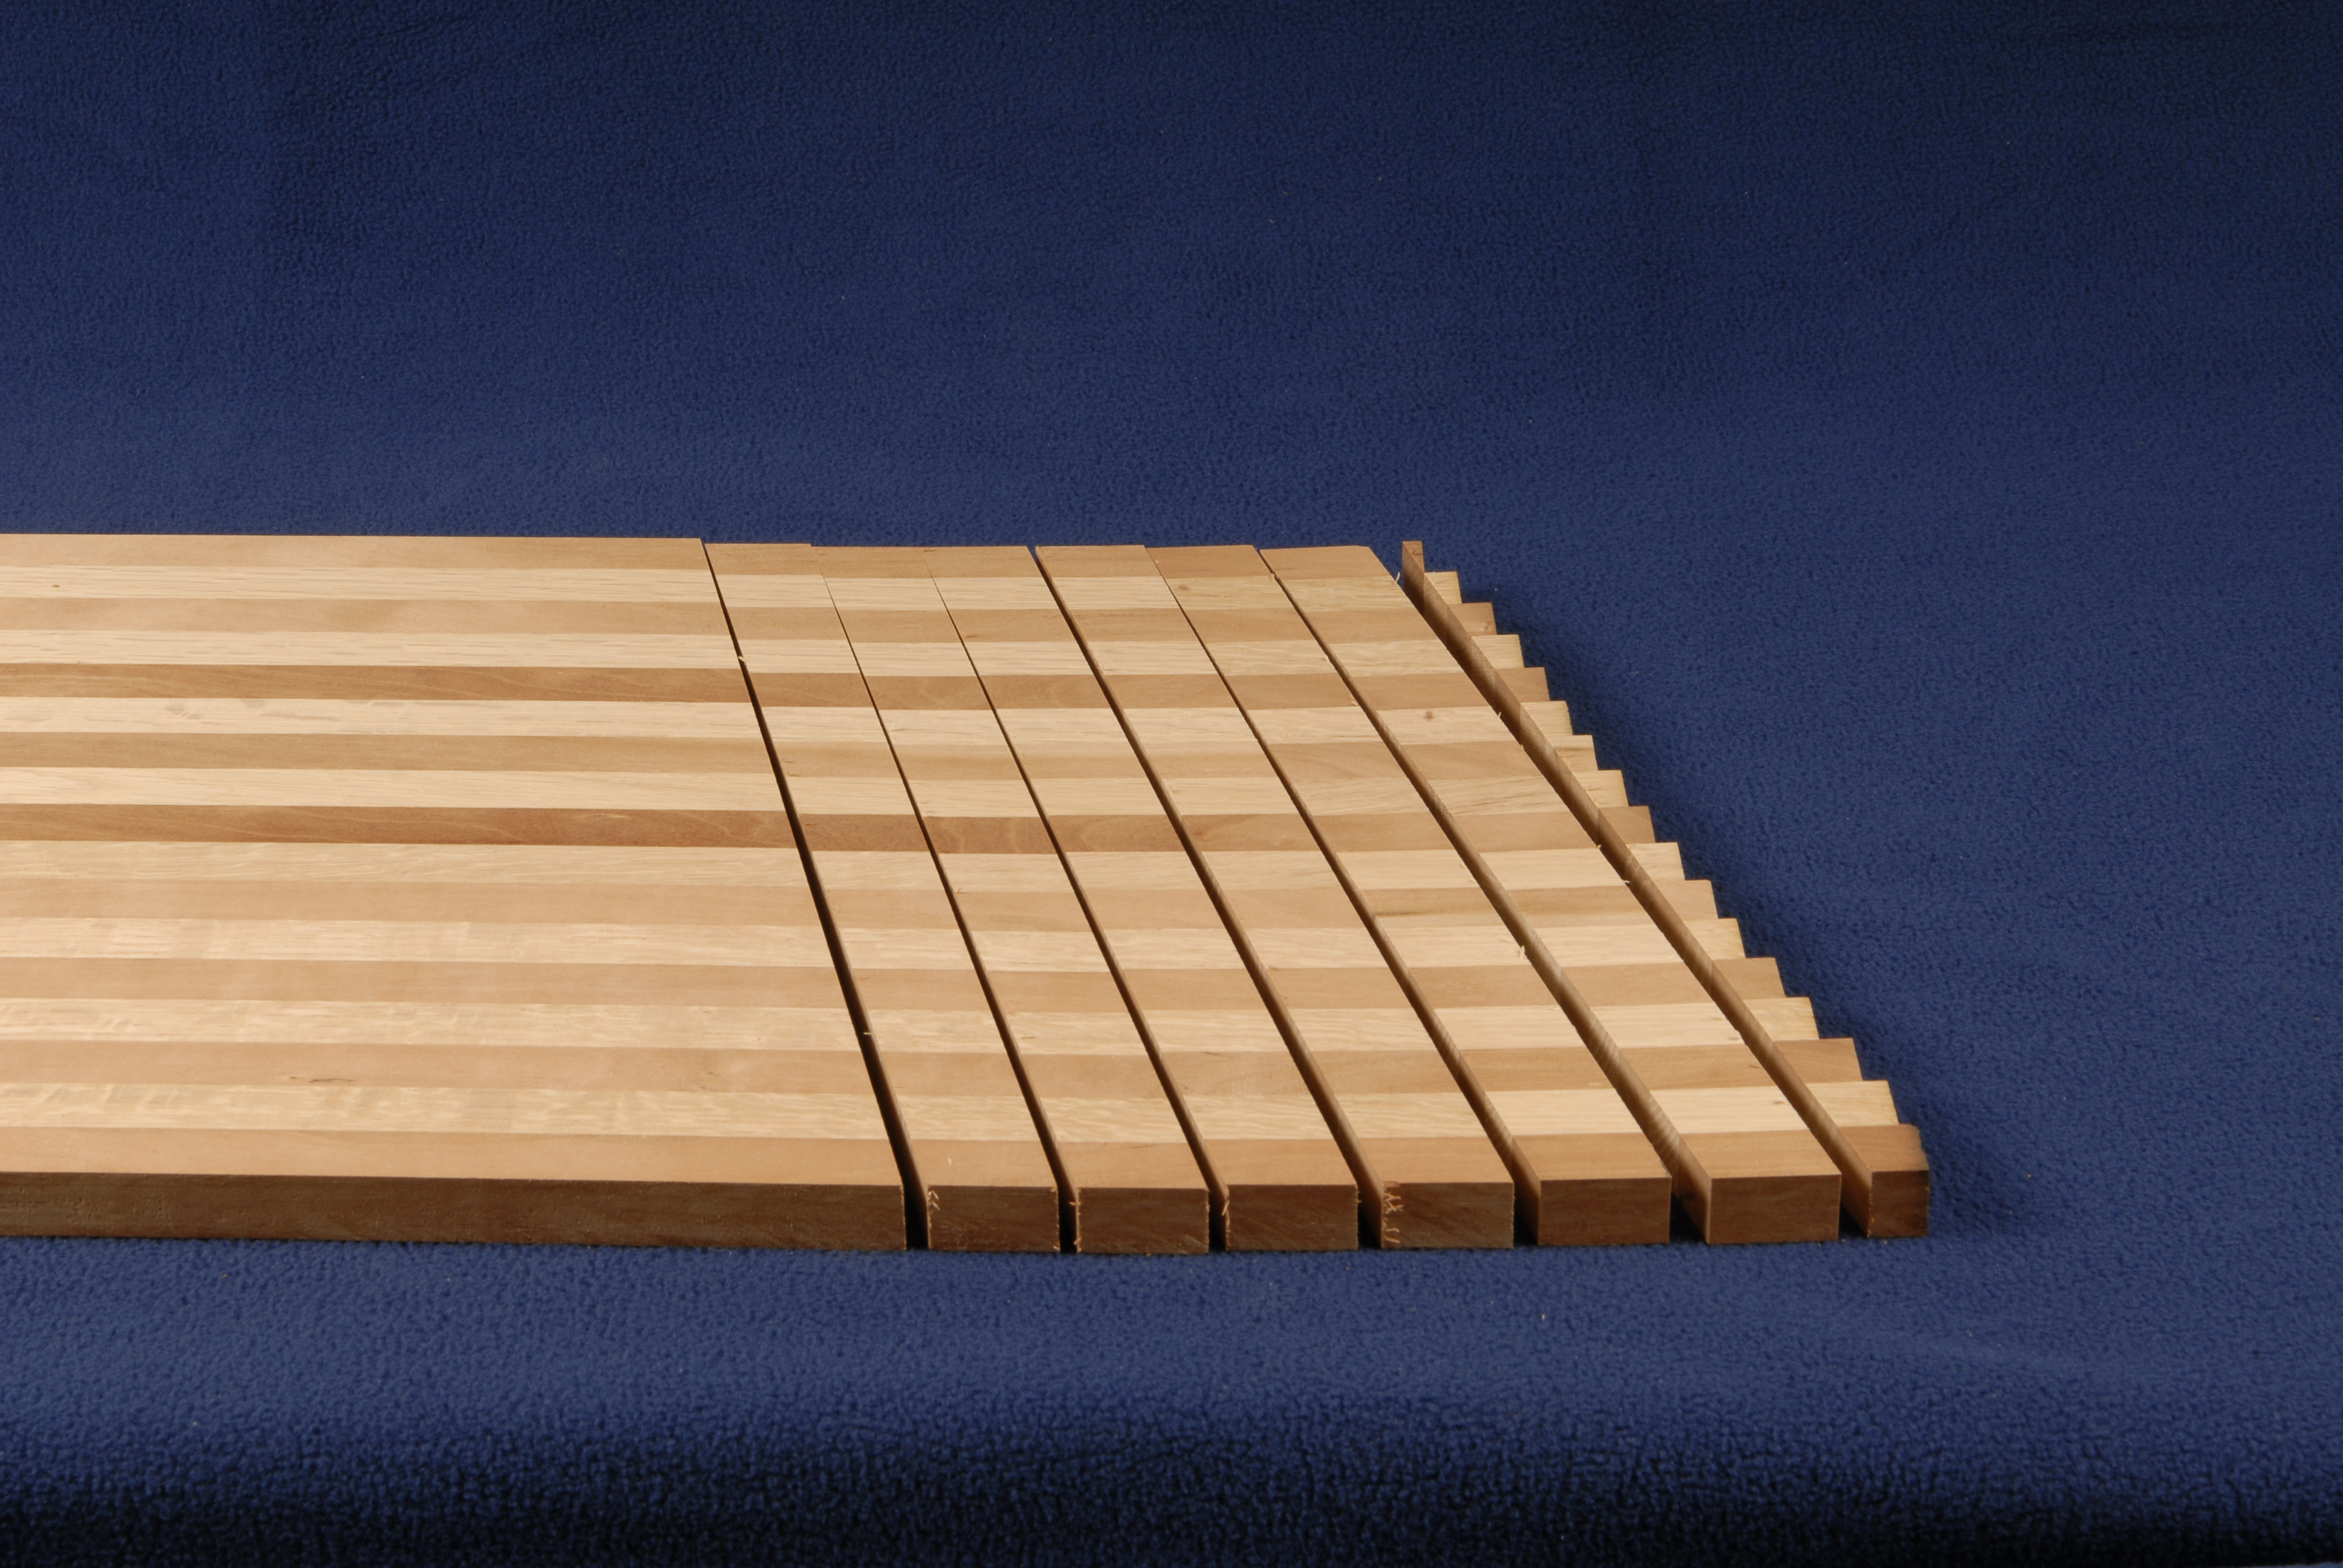
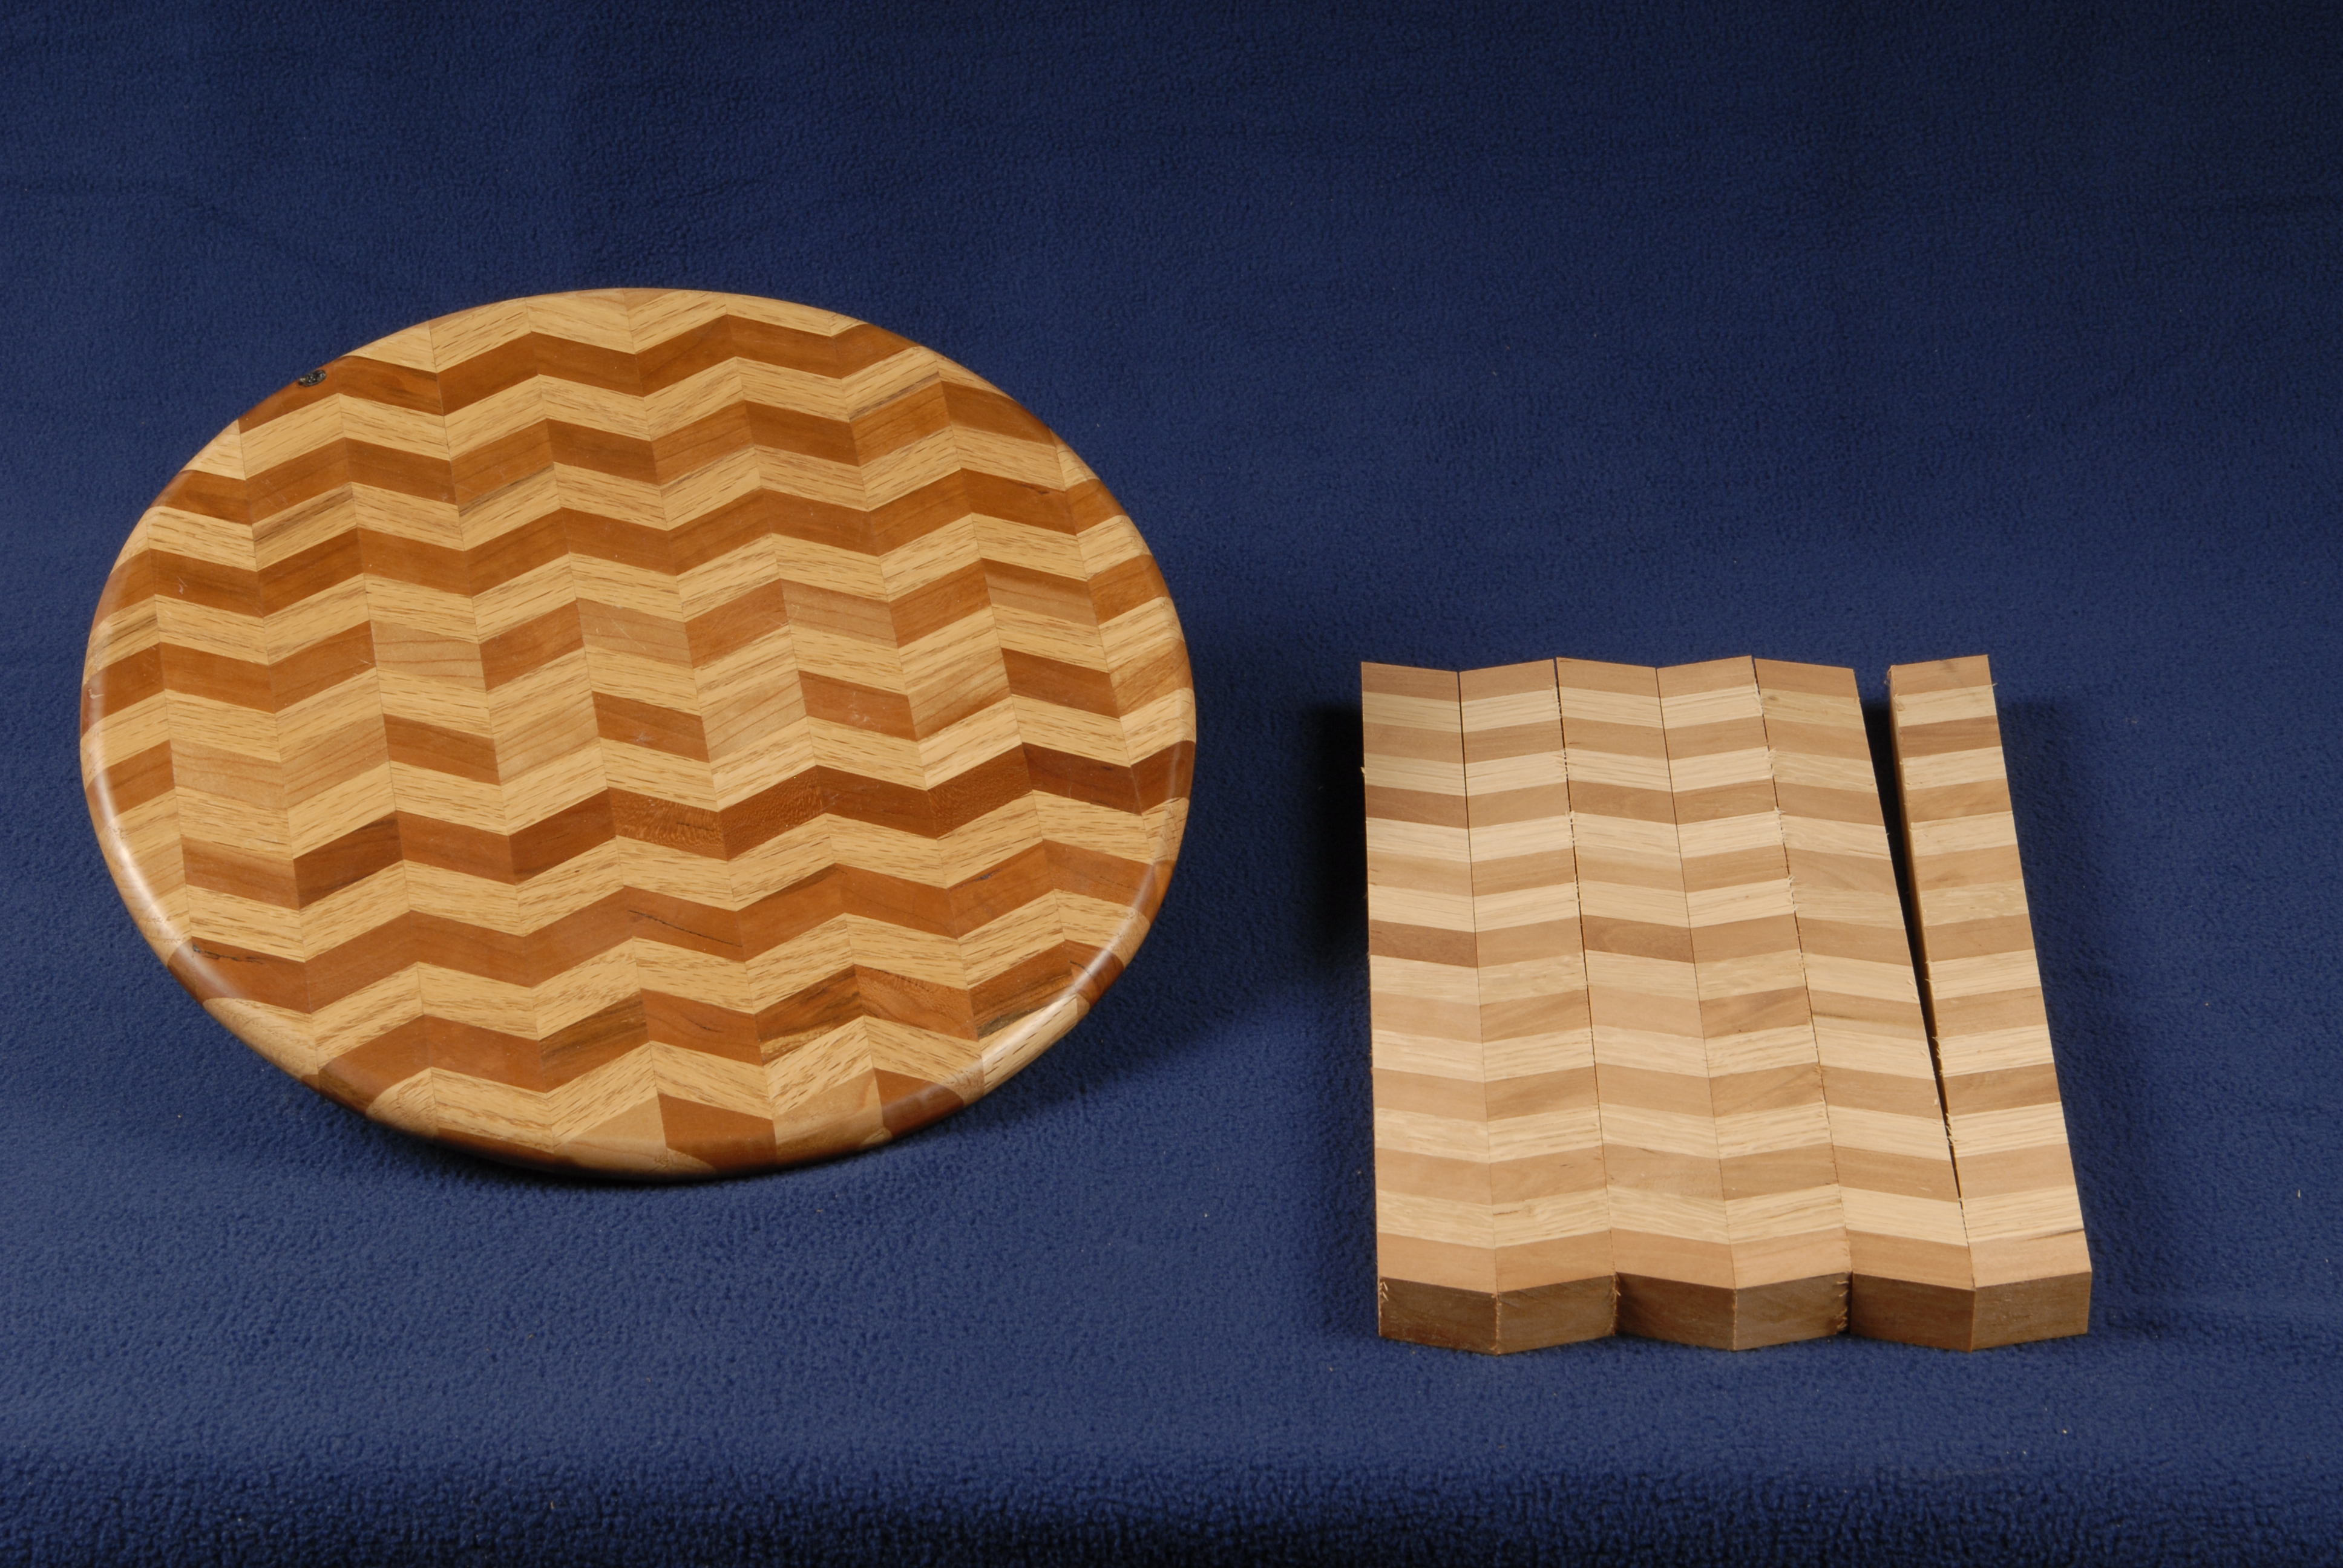
Once our miter is ready we can begin cutting diamonds 6 at a time.
Weather table saw or miter box this process must be precise and consistent. Uniformity is the key.

Notice here the 6 laminations sequenced to form the linear design. The circular design is simply a different order of the ‘Tags’ (what I call each cut section of 6 diamonds).

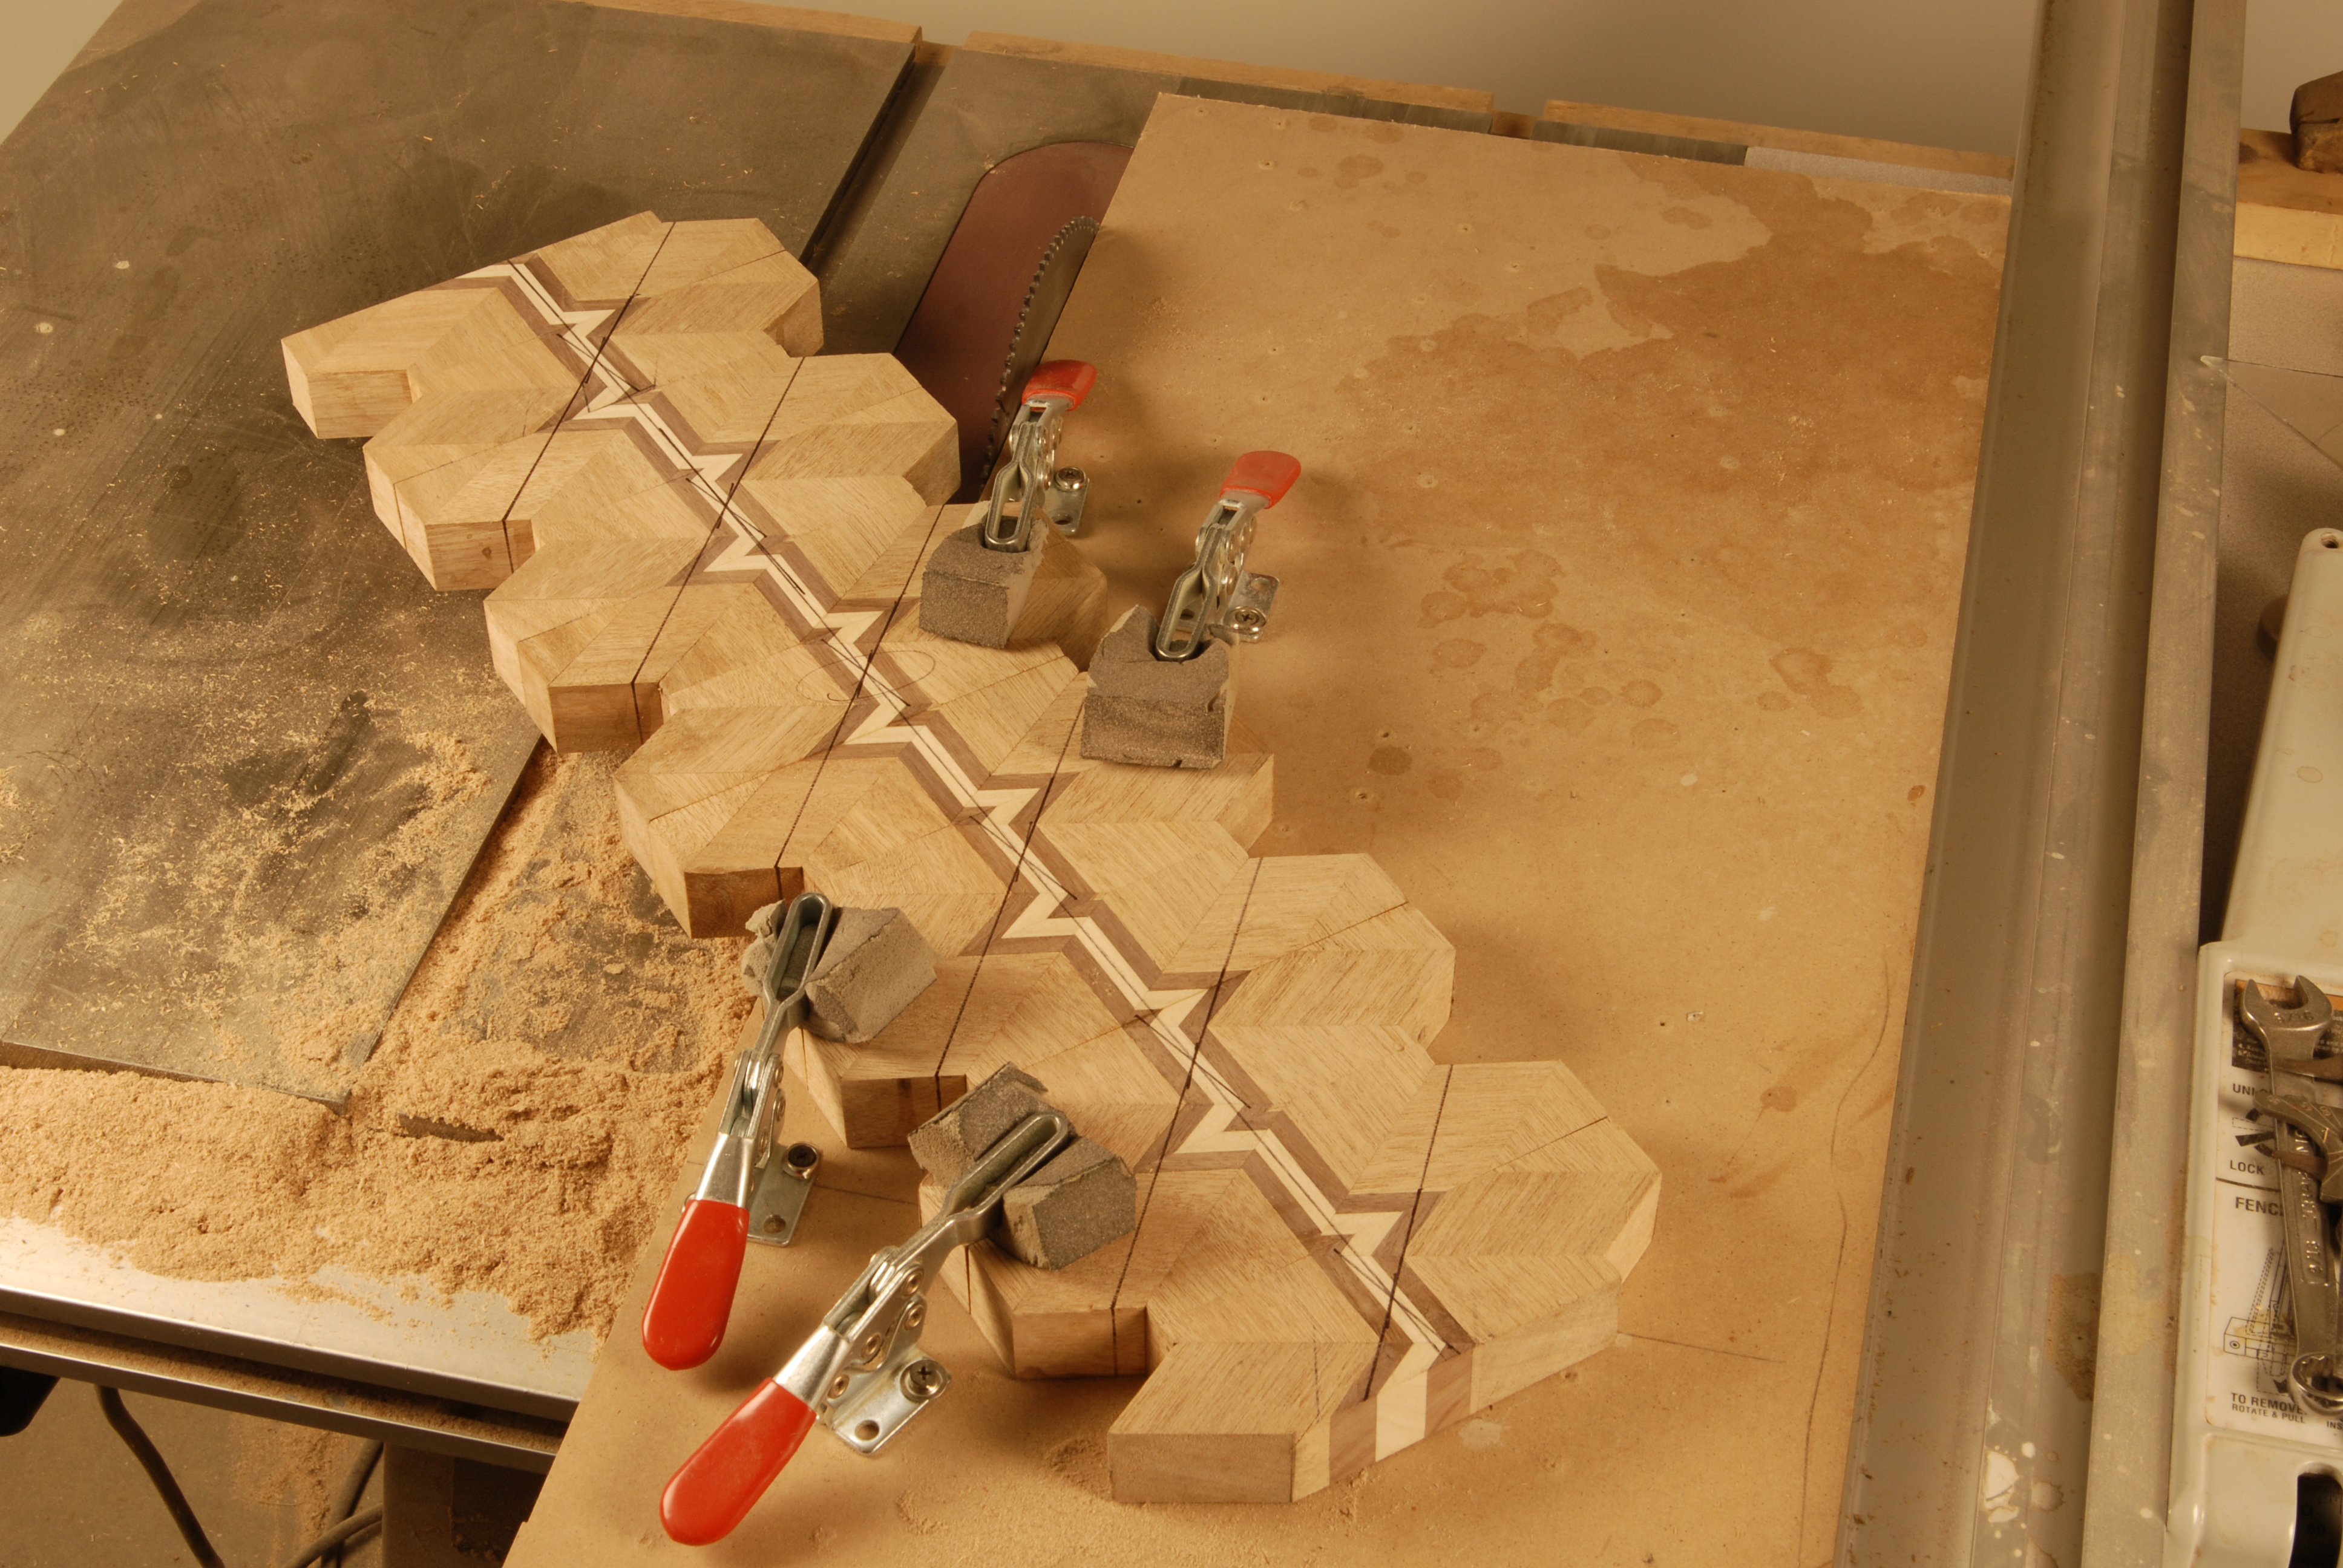
that we are more comfortable with the design we can get the glue bottle out. We begin with a diamond of diamonds. With all projects like this it is always best to glue in stages and steps. In this case, larger diamonds.
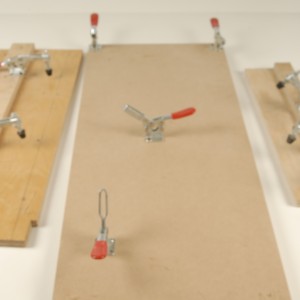
Notice the rubber bands and glue boards. Because the shape of a diamond will not support glue pressure on its pointed ends these ‘outriggers’ so to speak are necessary
Above the finished diamonds form the linear pattern

Beginning to take shape

And here you have it. It is important to trim the unfinished 2 edges to make these stars come together perfect. A miter or table saw jig work well for this as will a disk sander.
Care must be taken maintain the exact 22.5 degrees and not to remove so much material as to disrupt the overall design pattern.
In the interests of time and space and knowing a picture is worth well over a thousand words, especially to a wood worker I will show more and talk less.

A dry fit up showing both finishing techniques. One with a continuation of the linear pattern and the other with a simple section of material cut to fit.

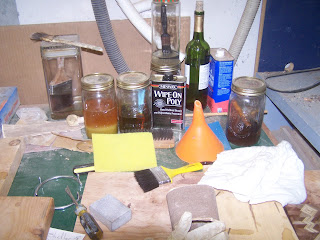
I have found the best way to finish and flatten these is to use a belt sander.
I hope you have found this posting helpful in opening up new dimensions in woodworking. It is one of the most fun projects I have enjoyed for some time. Remember if you try it be sure and let me know how you did.
Always gluing something:
Steve

3D Designs Using Multi Generational diamond concepts

Here is a post I am working on / a step by step on incorporating multi-generational concepts in developing diamond 3D design.
Thought I would tempt your appetite with some pic’s first.
These are all through and through, no substrate, all glue.
If you like what you see stay tuned.
Steve

Game boards


My Grandfathers Lathe

My apologies fans. A couple of big jobs back to back have taken me out of the loop but not out of my shop. I have been experimenting with a couple of new ideas and designs that I think you will really love, both on the lathe and off. Give it a read and tell me what you think.

Like most folks I have been playing on game boards since I was a child. For years now my son’s have enjoyed beating me at games that I taught them at a young age. Chiefly on the list are chess, (which I always loose at) and backgammon, (at which I can sometimes still beat them). Winning or loosing they are fun for everyone and the board and its elegance seems to heighten the experience, especially if you can say ‘yea, I made that’. So I thought I would take some time to show what can be accomplished with this post and wet your appetite. In the near future I will make separate posts on the how to of the chess board, the backgammon boards and some basic tips on how to develop the playing pieces on the lathe.


This board is actually the first try at a chess game board I did some 18 years ago. It is of ebony and curly maple squares with a satine (bloodwood) trim and maple, ebony highlights. The board is approximately 24 inch by 24 inch with 4 inched tall sides with drawers for the pieces on each end. Its sides are of mahogany and it has a bottom of simple felt. 18 years ago my shop consisted of a 10 by 14 room with a craftsman 10 inch contractors table saw, hand tools and a belt sander along with my grandfather’s lathe. So this is doable for the humblest of shops. Notice also that the alignment and glue lines are remarkably intact. With these there are so many ends glued together that separation is an issue. After 18 years it is still looking good and that is remarkable for this type of woodwork. Simple tips help get this result.

Here you can see the drawers and how they slide into and under the board. The pieces are of ebony and bird’s eye maple and are 2 to 4 inch tall and their bottoms weighted with poured lead and finished with felt. We wanted to make the bottoms heavier so the pieces would be less likely to tip over during play and we are fond of banging them down with a resounding ‘checkmate !!!!!’.

These are more recent creations and consist of both the backgammon and chess. Both of these pics are of different sides of the same piece. Bottom is chess, the top backgammon or vise versa.


Cherry, walnut, ash and mahogany make these stunning boards which also house drawers between then for the playing pieces. Again they are around the 24 inch square area.


Same here again with some basic pieces beginning to take shape. Notice on the chess side the drawers are slightly pulled out giving you an idea of the depth of the piece.

So I hope this post left you wanting more. These projects are not simple or easy, but doable if you are willing to make mistakes and push through the difficulties to get to a finished project. As some wise old woodworker once said, ‘the difference between a carpenter and a wood craftsman is the craftsman has very expensive kindling in his fire place’.

Keep turning, keep gluing

Steve